


Prefinished Protection
What is a good product to use over prefinished flooring to protect it in a new construction environment? I often find that kraft paper protection is not enough.
Terry Reeb, president of St. Petersburg, Fla.-based dealer Hardwood Specialists, answers:
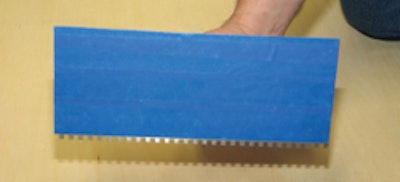
The most important question you must ask is, "Am I protected?" The best way to protect prefinished hardwood flooring is to place kraft paper underneath sheets of Masonite taped together (hard side up). Masonite is readily available, easy to carry and hard enough to withstand almost anything.
You may want to include it in your bid. My company charges $1 per square foot for this service. Another good choice is door-skins. We reuse the smaller cuts or pieces to help flatten the subfloors on the next job. The third best is rolls of 4-foot felt taped to the kraft paper. The felt is lightweight, easy to re-roll and good looking. Remember to never tape anything directly to the hardwood flooring.
You are almost better off not using kraft paper alone, because all the debris underneath the paper gets ground into the prefinished floor. Keeping the floor exposed lets other tradesmen see the wood, and thus they are more careful than they would be if you use kraft paper alone. If you don't want to cover the floor, encourage everyone to remove their shoes at the front door.
Place a box of booties there, too, for the boots of the more stubborn tradesmen. Keep the place as clean as possible. Sometimes, if my crew is near the job site and have time, we will swing by and vacuum the whole house for free just to keep debris off of the floor.
As a side note, remember that if you only partially cover the floor, there may very well be a difference in color (think Brazilian cherry) when you pull up the protection. So, if you do cover the floor, carefully cover every single inch.
Applied Knowledge
Which applicator should I use for applying solvent-based finish?
Chris Pryjomski, technical sales rep for Seattle-based finish manufacturer Glitsa American Inc., answers:
There are several applicators that will work well. Each particular job dictates which method to use. Traditionally, solvent-based finishes are applied with a lambswool block applicator or a Chinabristle brush, but we're also seeing some of the newer methods, such as rollers and T-bars, being used.
There is no right or wrong application method. Each job will dictate which is the best method. For example, you have to consider if the job site is wide open or very cut up. In a cut-up application, you'll usually see a lot more hand-brushing or rolling. If it's wide open, you could do very well with a lambswool block or a T-bar applicator.
A key to applying any finish is to make sure you follow the manufacturer's recommended coverage rates and dry times. Hot, dry climates may require coating early in the morning or early evening with a faster application method. In a hot, damp climate you have more open time; just make sure that there's no sunlight shining directly, creating hot spots where the finish will dry faster.
All four methods will work in different situations as long as you follow the recommended coverage rates, keeping in mind the job site humidity and temperature. When in doubt, don't be afraid to call your finish manufacturer.
Creating a Row
How do you nail the starter row of a solid strip flooring installation?
Mickey Moore, technical director at Memphis, Tenn.-based NOFMA: The Wood Flooring Manufacturers Association, answers:
First of all, if the installation is over wood joists, you have to mark your joist lines so you nail into your joists. If you're starting at a wall line, you need to face nail or screw your starter row. Use 7d or 8d galvanized casing nails or trim screws. These 2 1/4- to 2 1/2-inch fasteners are long enough to reach the joist and add additional fastening. You don't have to worry about nailing into joists out in the field because the 1 1/2- to 2-inch fasteners in the field are not long enough to add additional holding power. You also need to nail at the ends of every board (1 to 3 inches from the ends).
Place the face nails at joist lines and at board ends about 3/4 inch from the groove edge. If you use trim screws, you'll need to predrill your holes, but the screws will really hold the starter row in place. Then, blind nail the row at the same locations of the face nails (you'll end up with two fasteners at every joist and at the board ends). People ask me about using 15-gauge nails from the finish nailer, and I say typically those nails don't have enough meat to really hold the flooring in place.
If you're starting a row out in the field, you'll have to use a spline (or "slip tongue") so that you can blind nail both sides of the board (no top nails in this application). You'll need to glue and nail the spline. When you nail spline, you have to use a small scrap piece of flooring to support the spline so it's held at the proper level. Otherwise it can roll down, and the next row won't go in.
If the flooring is over a plywood-on slab system, you'll have to cut your nails off so they're shorter for both the face nailing and the blind nailing. Use the same nails or screws as above. You want to nail about every 12 inches along the boards and at ends. To cut the nails, you can use a pair of sidecutters or small boltcutters. I like to use the boltcutters because I find they've got a lot of leverage and don't wear your hands out.


