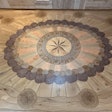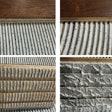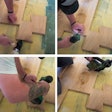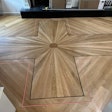

Drawing a medallion may seem difficult as a whole, but when broken down to a step-by-step process, it is quite easy and can be done with little effort relative to the one-of-a kind wood art being created.
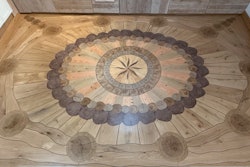
This medallion was commissioned for a 3-by-4-foot second floor landing. Discussions with the homeowner and a few rough sketches via fax were all that was needed to get started.
A final scaled drawing was created, wood species were selected and approved, and the drawing was copied to a plywood work base to scale. This project was drawn in about 30 minutes, and the final medallion was completed after 19 hours in the shop. I chose one of my mechanics who has never built a medallion before, although he has installed many on-site, so the time spent here should be similar to anyone out there who has not created a medallion before.
In selecting the different woods for the medallion components, a little planning is required, as well as familiarity with hardwoods. Here, the outside points were selected with light-colored woods (ash and maple) because the medallion is being installed in a darker floor (Brazilian cherry). The center—ash and wenge—was chosen for high contrast. The rings help tie all components and flooring together by selecting wood tones close to the main flooring color—American cherry was used for the thinner rings and Brazilian cherry for the center ring.
Grain orientation helps bring a medallion to life, as does the different wood species. All wood pieces were selected for straight grain. This is quite easy out of ordinary stock material by just orienting the grain in the direction you need for each piece. Points were set with the grain in the radial direction (from the center out), rings were set with grain running perpendicular or tangential to the secondary points, and the center pieces have grain direction to form a box pattern.
Necessary materials:
- lumber in desired wood species and dimensions
- two-part epoxy
- hot-melt glue
- 1 square foot of ¾-inch plywood and a finish nail (for jig)
Necessary tools:
- compasses (small draftsman type anda larger job-site size)
- miter chop saw
- table saw with a miter jig
- edge sander or belt sander
- metal ruler or straightedge
- tape measure
Step 1: Make Your Sketch
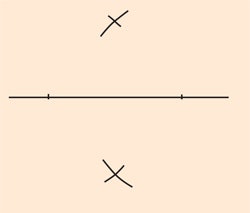
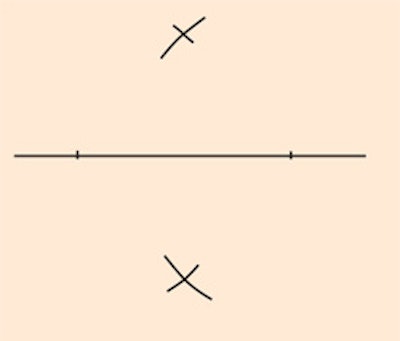
A: Set up a set of pendicular working lines and then a set of 45-degree lines, using the trammel-arm method of crossing arcs. With a straight line, mark two points from which to pivot a trammel arm.
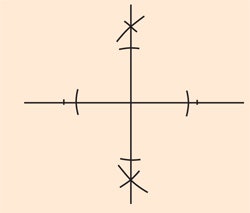
B: Pick a distance where two arcs can intersect at near-right angles. This establishes the perpendicular line to the starting line.

C: Marking out a circle from the intersection of the two lines gives four intersecting points that can establish45-degree lines with the trammel arms.

D: Begin defining medallion components. This one has two ½-inch rings with outside radii at 2½ and 4 inches. The point tips are defined by marking across the perpendicular and diagonal lines at the requisite dimensions of a 9inch radius for the north and south points and a 7-inch radius for the rest of the points.

E: Mark the width of the main points (N, S, E and W) where they meet the outer side of the inside ring. Here the width is 1¼ inch for each point section or 2½ inches overall. Draw lines connecting these marks to the outside point tip marks. Repeat the same procedure for the secondary points (NE, SE, SW and NW) with a width of ¾-inch for each point section, placing these marks at the outside edge of the outside ring. Draw the lines connecting these marks to the outside point tip marks of the secondary points.

F: Erase or white-out the working lines from the compass drawing, leaving behind the pattern for the compass you want to make.
Step 2:

Transfer the pattern for the medallion to scale onto your plywood work base. Follow the same steps as for the drawing, only multiply it by the necessary factor to make the pattern to the larger scale.
Step 3:
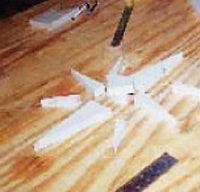
Beginning from the center outward, begin with the four rough-cut center pieces. Glue up two pieces to make a half center, then glue the other two. Do NOT glue the halves together yet. Use a belt sander to make the edge straight on each half. Dry-align each half to see if the perpendicular joints line up. Once done, the two halves can be glued together and left to dry. The other components can be rough-cut. The points can be sanded and edge-glued in pairs. When the glue is dry, they can be trimmed to size. The center piece is trimmed to the circular size needed.
Step 4:

The first ring—American cherry—is cut in the rough and fit to the inside of the center piece. Do this by tracing the shape of the curve and sanding. Again, pay close attention to the way the joints line up, directly opposite each other. When the first ring is fit to the center piece, glue it in place and let dry. When completely dry, trim to fit the circular size needed (here it is a 5-inch diameter).
Step 5:

Next, the main points are dry-fit to the center. Temporarily glue these with hot melt glue, again aligning the points. The temporary glue helps align and fit the next two ring sections to the centerpiece. The next ring set is fit between the points and glued to the center. Take care not to get glue on the main points; they will need to be removed. When the glue is dry, remove the main points and trim them to a circular size. As before, reattach the main points with hot melt glue. Repeat this last set of steps to attach and trim the last ring set to the center piece.
Step 6:

Now permanently glue the main points back in place. The secondary points can now be aligned and attached to the completed center piece. I cannot stress this enough: Make sure the joints and points align directly opposite each other! The best-looking medallions are those where all joint lines align across from each other. A quick visual check is to look at medallions from a very flat angle and try to line up a near joint with a far joint directly opposite. The smallest offset can be seen this way, which is rarely picked up from a standing position looking down.
Step 7:

In addition to a visual check, use a straightedge to ensure the correct alignment.
Step 8:
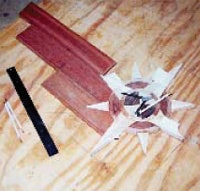
The medallion is now complete. We have only to install it in the floor. The medallion is a focal point at the job, which will require a center layout. To make this work easier on-site, we precut field material around the medallion to take to the job. Number the field material for easy installation at the job site, and the job is ready to go.
JIG INSTRUCTIONS
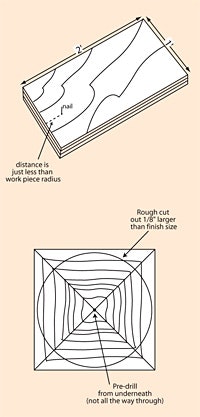
To build the jig for cutting the center circular piece, all that is needed is a 3⁄4-inch piece of plywood base and a 6d finish nail. Put the nail through the 1x2-foot plywood in a position just less than the radius distance needed to sand the workpiece. Be sure the nail does not exceed 1⁄2-inch above the plywood face. Rough-cut the four center pieces (already glued together) to within 1⁄8 inch of the finished size desired. Predrill the piece from underneath to accommodate the nail tightly. Do NOT drill completely through. Place the workpiece on the nail and clamp the jig to your work bench. Rotate the workpiece against an edge belt sanding machine, sanding a circle based on the distance from the pivot point to the sandpaper. Continue to adjust the distance to the sandpaper until the desired size for the circle is achieved. |


