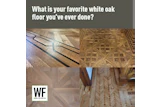
When you participate in a discussion, realize that everyone comes to the table at a different level of knowledge. I remember a medallion demo at an NWFA workshop last year. I helped Frank Kroupa and Bob Goldstein install a medallion (well, I was doing all the work while they were standing shouting instructions at me). I explained to the 37 students who attended that workshop how I used screws in a medallion installation. One of the students asked me why I used screws on a medallion. He thought I was face-screwing the medallion. My point? A lot of us look at other people's floors and we don't realize what went into the creation of the floor. The more educated you are, the more you'll understand and appreciate the technicality of custom floors. I separate technicality from art/design. One floor could be stunning and so easy to make. The other could be so boring, but what a technical challenge for the installer. The real deal for me is when a floor is both.
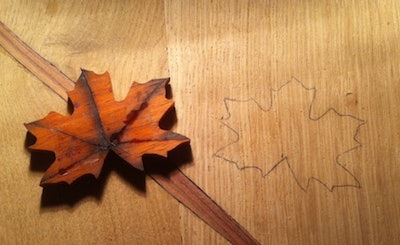
My first custom floor had ¼" thick (6.35 mm) leaves and branches I put in it. I scrolled the leaves one petal at a time, sand-shaded each one, assembled them, carved them into the floor and put in the stem as a final touch. In this post I'll show you how to take a free form and put it in a floor without guides or jigs. Here are my steps:
1) Decide where you want the inlay. Make sure the customer agrees, and get it in writing.
2) Trace your inlay with a fine pencil or a marking knife:

3) Use a plunge router with inlay bits to cut out the cavity, stopping just shy of the line.
4) Use hand tools to do the final clean-up and work to the line:

5) Dry-fit your leaf. Do not push it all the way in. it needs to be snug but not too tight, or it'll break when you tap it in:

6) Apply yellow glue to the floor and walls of the cavity.
7) Carefully tap your leaf into the floor using a block.
8) The leaf should be a hair proud of the floor:

Sand it so it is flush with the floor.
Reading this, you might think it is easy and quick. It is, if you know what you are doing and you've done it before. There are so many woodworking techniques and skills that go into every step, and I will share them in the next post. I will explain and analyze every step of that process. Thank you for reading, and I hope this will trigger someone's interest into making a special floor. In my next post we'll go hard-core technical.