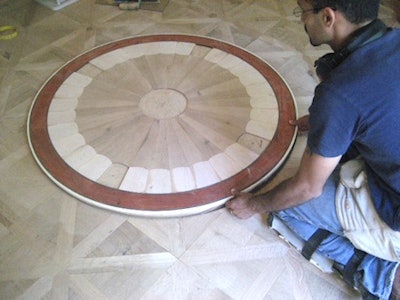
Now it is time to install the medallion in the floor. Make sure you know how the medallion is supposed to be oriented and where exactly in needs to be installed. It is a great idea to have your customer confirm and sign on that decision in writing.

- Plunge router
- Circle jig
- Drill and screws (if your medallion has knockouts)

Place the medallion on the floor and trace around it with a marking knife or a fine pencil. That mark is just for reference. I don't know about you, but I'm a visual animal: I need to see that mark. Next set up your circle jig and router and route away. Hold on, first make sure that:
- Your bit is new, sharp and set to the correct depth
- Your jig is precise and well-secured to the subfloor
- Oh, and READ THE MANUAL BEFORE USING YOUR ROUTER. Ask me why I had to mention this, no really, ask! Well, since you insisted:

Once you are sure the medallion fits, vacuum and spread the glue:
Secure the medallion with screws through the voids we left in the maple scallops. Once the medallion is secured, glue the knockouts with fast-setting epoxy.
And we are done with the easy parts. Next we will work on the holly stringing and the center pieces.