


Hello all, Keith Long here with Thunderheart Flooring to continue with the flooring project we started last time where we were ripping out carpeting before installing hardwood on the diagonal.

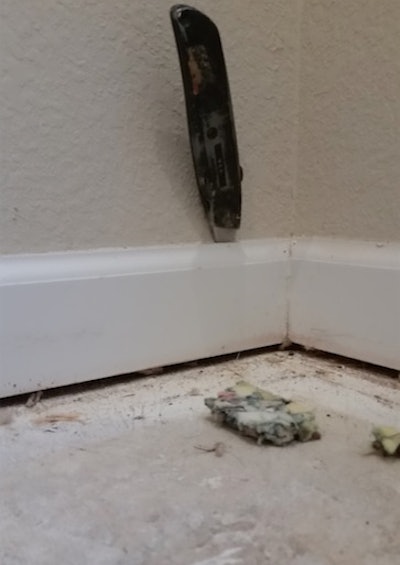
Now that the tack strips are up, I scored the caulk line at the top of the baseboards. I do this to avoid tearing of the sheetrock and/or paint as the baseboards are removed. With the blade in hand, I went around the entire perimeter of the room.

A trim carpenter who goes by “Mean Gene” demonstrated this trick of initially loosening the baseboard from the wall by tapping a putty knife between the drywall and the baseboard, then gently pulling back toward oneself. This helps avoid the marring that can occur on the profile of the baseboard when trying to tap a pry bar down from the top first thing with the nails holding fast.

I use a pry bar to finish off the separation of the trim from the drywall. This particular home had MDF trim, so I opted to use two pry bars—one to loosen on the lead edge, and one following up behind it to achieve a full separation of the nails from the wall.

Once removed, I numbered the back of the baseboard, then put the corresponding number on the wall where it will be covered once the trim is put back toward the end of the job. I use a pair of dikes to pull the nails from the wall, and, from the backside of the trim, I pull them through. This way, the putty on the face of the trim is still intact.

In Colorado, many of the walls are textured, usually what is referred to as “knock down,” where drywall mud is run through a texturing gun with a medium to large orifice. Once it has dried a bit, the mud is knocked down somewhat flat, usually with a wide, flexible non-metallic blade. This technique can lead to an uneven surface where the top of the trim meets the drywall. As a result, many painters caulk along the top of the baseboard. Since the trim will be set a little higher once the hardwood flooring is in than it was while carpet was there, I cut the caulk line off flush with the back side of the trim. This way, the trim sets more flush with the wall than if the old caulking were still there.

Once the trim was set safely out of the way, I took a piece of flooring, turned it upside down, and used an oscillating saw to undercut the door jambs. I was sure the subfloor was free of debris where the piece of flooring sat. I turned the flooring upside down to do this so if the tool marred the wood a little bit while operating, this piece of wood was still viable to be used during installation. The advantage to undercutting in this way is the flooring can be installed under the door trim and casings.

I used this scraper over every square inch of the subfloor to get anything sticking up removed. Carpet staples usually come up fairly easily this way. If they don’t, I remove them with a pair of dikes. The scraper hung up from time to time on framing nails that were up proud of the level of the subfloor, which I set with a claw hammer. Any nails that were left in the subfloor that had been holding down the tack strip I pulled out with a pair of dikes.

Each year that I have been involved as a hardwood flooring contractor, I have become more meticulous about keeping job sites clean. I have found that the extra time spent sweeping and vacuuming has led to flatter floors and more referrals.

I have two main vacuum attachments, which I refer to as the pipe and the wand. The way I was taught is to always run the pipe around the perimeter first each time I vacuum. Then, I vacuum the field with the wand.


The subfloor on this job had a mid-grade contusion. I like for the substrate to be flat and free of voids, as I feel this sets the job up for long-term success. I carry this Woodwise knot patch on my work vehicle at all times. This Knot Brown color comes in handy for patching knots before trowel filling. It’s formulated to fill in large voids without cracking. So, I mixed the correct ratio of water with some of this powder, and used it to patch this area up.

I threw a box fan on this area—it doesn’t take long for this product to dry. Once I started sanding the seams and perimeter of the subfloor where the border would be installed, and got to the point where a sheet of edger paper was pretty well used up, I hit this spot with the edger to sand it flat.

I checked to see if any of the subfloor was loose and needed supplemental fasteners. This particular job did not have any areas where the subfloor was moving or squeaking. If it did, I would have addressed those areas at this point. While sanding the seams on the subfloor, I typically use 36-grit edger paper.

Note how as I’m starting to sand this seam, only the left side is getting any material taken off. This suggests that the left side is still higher, as the right side has yet to be touched by the sandpaper. I keep going until both sides are abraded, and everything feels flat.

Since this job is designed to have an 8-inch, double picture frame border, I also sanded the perimeter. This way, the adhesives have the best chance to perform at an optimal level. Trying to glue to dust or paint does not get the same holding power as a freshly abraded, clean substrate.

I make a mental note of areas on the subfloor that will gum up the sandpaper, and address them only when my edger paper is cashed in. Just before replacement, I hit these areas.

The toekick areas under the two built-in cabinets of this job site had significant paint overspray. So, I got out the toekick edger and addressed these spots with some-50 grit paper.
Let’s meet up next week to go through how to lay out lines for the angled flooring and the border. Then, we’ll get this baby papered up and get specific about how I started the installation. Until then, stay sharp!


