What you are about to read on resanding and refinishing is based on real events; the names have been changed to protect the innocent.
You could tell the dog days of summer were passing into fall … the early morning air felt crisp and somehow cleaner. My cell phone rang while I was taking Molly the bulldog and Lulu the shih tzu for their early morning sniff fest. I didn't recognize the phone number and answered:
"Good morning, this is Bob."
"Hi, my name is Joyce Kilmer. I am a friend of Donna Mills, who is Ivy Woods' neighbor. You sanded the Woods' floor several years ago and were recommended to me by Donna."
Huh? Oh. I remember the Woods. "How may I help you?"
"We have wood floors that need to be fixed and maybe resanded. Ivy told Donna, who told me, that you charged $2.50 per square foot 12 years ago; I assume that price is still good."
"Well, as you know, prices of pretty much everything have gone up in the past decade or so. I would prefer to make an appointment to look at your floor and then give you an estimate. I have a couple of quick questions before I come over."
"Okay."
"What species is your floor, and is it solid wood or engineered?"
"When we bought the house we were told the floor is real wood—something like Madagascar cherry from Brazil, very unique."
"Interesting! Well, let's just set up a time and I'll come out and help answer some questions."
There are myriad questions required in order to do a proper estimate on refinishing a wood floor. Is this an engineered floor? Does the finish contain aluminum oxide or ceramic? How much wear layer is intact? Is it enough to sand the floor again? What is it coated with? How old is it? Could the old finish contain lead? Is there any damage such as pet stains? Is the layout such that the homeowner will have to vacate? Is the floor cupped or crowned? Does it have unusual gapping?
It is best to make your own observations without stressing the homeowner with too many questions. In the worst-case scenario, if you see the job and determine you won't be able to meet their expectations, recommend another contractor you don't like and go home! Just kidding.
Let's talk about these questions and why they matter so much when you're considering resanding and refinishing a wood floor.
Is it engineered or solid?
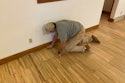
Look for a place where you can see the wood from top to bottom. You can pull back carpet, remove shoe molding in a closet or ask if there is any wood left over from the original installation. Don't guess. Some engineered floors made today are very hard to tell from solid products by just looking at the face. Verify before you start.
Just for giggles, imagine you started your first pass on a floor that the customer told you they know for a fact is solid wood. Let's add a little drama and say there is some slight seasonal cupping—nothing radical, just enough end-tipping to make you start cutting with 40 grit instead of 60; up, back... toast! No coffee. But you said it was solid wood, lady! Sorry, you are the professional; verify before you start. My rule of thumb is the face must be at least 3 mm thick. For anything thinner, I would not recommend a total sand and finish, but rather a recoat if possible.
RELATED: Tips on Sanding Wood Floors With an Aluminum Oxide Finish
Does it have aluminum oxide or ceramic?
If there is enough wear layer but the floor has aluminum oxide or ceramic finish, you could end up wasting a lot of time and material. Keep in mind that most manufacturers use aluminum oxide or ceramic in their finish in one form or another. Do one pass with your big machine with 80-grit paper. Aluminum oxide finish has a very distinct odor when you cut it; it's an acrid, kind of acidic smell. Further, the finish will "shred" instead of coming off cleanly. With these products, do not try to cut to bare wood on the first pass. First, shred the finish using a finer grit ceramic paper (80) moving at a good pace (moving too slowly will cause heat buildup). Your next cut should remove the remainder of the finish without removing too much wood. Use the finest grit you can to get the job done. Remember, you have to take more time and be careful not to over-sand to the core. Use high-quality ceramic sandpaper (usually a color such as red, purple, blue), not aluminum oxide (black), as it is very hard to sand off aluminum oxide with aluminum oxide. Sanding engineered flooring takes patience and skill, so charge for it!
For factory-finished jobs, can you meet their expectations?
On these jobs, customer expectations are going to be high from the start. Their new factory-finished floor was relatively flawless. Educate them about the reality of conditions at a job site vs. the factory. I hard-plate or triple-disc every floor I do, especially when resanding previously factory-finished floors. Work hard to avoid dishing out grain, and carefully blend all of your edger work with the big machine work. I use an orbital with dust containment to remove every imperfection I can find, then I go over the entire floor with a hard plate or a three-disc sander (you can do as good a job with a simple hard plate remembering to orient the machine so the cutting area—3:00 to 3:30—is oriented to the grain of the wood). Be extra-diligent when buffing between coats of finish so you can avoid swirl marks.
What else should the customer know? Refinishing or recoating a factory-finished floor voids the manufacturer's finish warranty. Common sense, but bring it up anyway. You will be amazed at the responses. Also, microbevels will almost always sand out when you do a complete resand on engineered and solid prefinished flooring. Beware of big, deep bevels. On a resand, you may have to use a V-notch scraper and do the bevels by hand. Take that into consideration when pricing the job. On recoats with deep bevels, consider using a chemical system that cleans, treats and coats.
For a job-site-finished floor, what is the finish?
There are various ways to test the finish type. Using a scraper, you can remove a small amount of finish to determine if it is poly in one form or another. Wipe the floor with a clean rag dipped in mineral spirits: If a yellow residue comes off, it may be wax, or a combination of wax and oil. You can also use rubbing alcohol on a clean rag: Wax will come off on the rag and turn the wax on the floor white. Most other job-site finishes aren't a problem; just sand them off. But if the floor is relatively new, check for ceramic finishes: Take a penny and rub it face-down on the floor. If the penny looks like it's been sanded, the finish is ceramic. Paste wax, you ask? Read on.
RELATED: Clear Up Confusion About Wood Floor Maintenance
Ask a lot of questions about what's on the floor:
1) How has the floor been maintained? Has the homeowner applied any topical finish or wax? If they have been using a "refresher" it will most likely cause buildup on your sandpaper during the first cut. Keep this in mind when you calculate how much paper you will need. If there is evidence of wax buildup, you may have to strip the floor first using mineral spirits and either red pads or steel wool. Don't try to sand off the wax in one cut. Some wax will adhere to the machine wheels and sandpaper, ending up in the grain of the wood. That's big trouble when you try to coat the floor! Clean the machine wheels with mineral spirits after getting down to bare wood. If I run into a floor that has been waxed, I suggest rewaxing. It can save you a lot of grief.
2) Did the contractor leave any product with the homeowner, i.e., tung oil, poly, linseed oil, etc.? Oil and oil-based products will amber over time. When you sand the floor to bare wood, the color is going to be dramatically different … right now! This is especially true with exotics. Educate your customer and make samples. When the job is done is not a good time for them to find out about this.
One more thing: If it turns out that the floor has been oiled, but not waxed, and the floor can't be sanded, you can recoat with urethane. If it's wax, you can use a cleaner/conditioner ("Renovator" is a common brand name; there are others, too) and re-wax. Wax on, wax off only works in Kung Fu movies—I would never guarantee a resand job where I am sanding off wax and recoating with a urethane-type finish. Keep in mind that the very process of sandpaper on the wax and wood creates heat. The wax liquefies, and the sandpaper drives the wax into the grain of the wood. Then, the wheels on the big machine can get traces of wax on them that you may not be able to clean off. Any wax left on the wood will cause the finish to peel and you to (pick one): cry, scream, pull your hair out, leave the country. I am not saying that it is impossible to do a good job of removing wax and coating with urethane, but it is difficult and tricky. Put it in writing that you cannot guarantee that the finish will not peel, and cover your assets.
3) How old is the floor? Before the 1980s, some paints and finishes contained lead. Determine if the floor is old enough to have lead in the finish (pre-1990s) and if it has been refinished since then. If you can't get the answers you need, you can buy test kits to determine if there is lead. Just Google "lead paint test kits" and take your pick. If there is lead in the finish, call a company that deals in hazmat removal. Don't take the chance on contaminating you, your equipment or your customer's home.
For a job-site-finished floor, how much wear layer is left?
Try to find an area where there is a gap to insert a depth gauge, or remove a threshold or transition so you can measure the wear layer. Look for signs of discoloration over cleat or staple locations. Remember, on a solid ¾-inch wood floor, there is only about ¼ inch of original wear layer. Once you get down to the tongue and groove, sparks are going to fly in more ways than one.
Is there permanent damage that requires repair? Are there permanent large gaps?
If so, remember to charge extra to repair them using the sliver method (see this article on how to use slivers). Are there pet stains? You can tell not only by the discoloration but by the smell that Snowball is tired of the litter box. Trust me: You are not going to get it out by sanding unless you sand to the joists! Are there termite tunnels or rot? Bring these types of problems to your customers' attention and recommend board replacement. (Some of these problems don't show up until you begin sanding, in which case you need to notify the homeowner immediately.) If there is a live infestation, have them call an entomologist or the local bug man. (If it's the pet, well, that's the homeowner's call.)
RELATED: Wood Floor Cupping: Why Does it Happen & What Can You Do?
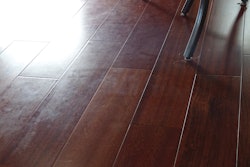
Is there cupping or crowning?
Check the moisture content of both the flooring and subfloor (using insulated pins on a good wood moisture meter) and make sure that whatever moisture condition that caused the problem is not going to be your problem. If there is an imbalance between the subfloor and the floor (more than a 2 percent difference in plank and 4 percent in strip flooring), ask a lot of questions as to how, when and why this problem happened. Don't sand the floor until it has stabilized (sanding a cupped floor before it has stabilized leads to a crowned floor).
Is the layout such that the homeowner will have to vacate during the sanding process?
Are the homeowners going to stay in the home during the process? Remember that you will have to work within their schedule as to when you can start in the morning and when you have to leave for the day. Make sure they know to stay out of the work areas during the sanding process.
It's a good idea to have homeowners stay out of the home entirely during the finish application process. You know when to wear respiratory protection and which finishes may leave a strong and lingering odor, but the homeowners don't. Plus, you don't want to arrive to apply the final coat and find mysterious foot or paw prints in your finish (or dead fish in the aquarium).
Even if the owners don't plan on being there during the work, isolate the areas you are working in and take care to not contaminate the HVAC system. Cover all of the HVAC intake grills with extra filter material. You can buy inexpensive throw-away filter material in rolls or cut pieces at your local hardware or HVAC store. Tape it over the intakes and discard it when you are done.
Going Forward
Okay. So you have determined you can resand and refinish this floor. Your estimate has been accepted and you have gone over customer expectations and selected a finish that will work well with this family's lifestyle (pets, kids, parties, etc.). Money has changed hands. You have covered the bases: dust containment does not mean dust-free, there may be a hair or two or some debris in the finish, etc. You made a sample to show the sheen level and stain color (if applicable), had the sample signed, and kept half in your office. Go to work! Keep in mind a few basics:
• Dust containment equipment or not, cover everything you can (without damaging wallpaper or paint) with plastic film.
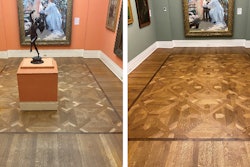
• Do not move heirlooms, fine art, expensive crystal, etc., unless you are heavily insured or mentally unbalanced. Take photos of the room layouts and any obvious existing damage to baseboard, door casings, etc.
• Check your power source. Make sure you have the power needed to run your equipment properly (see "Power Up" in the June/July 2008 issue).
• Start sanding with the finest grit possible. Do a pass or two to make sure the grit you chose is getting the floor flat without leaving unnecessary deep scratches.
Remember, leave as much wood on the floor as possible. Finer paper costs you less money and fewer passes means faster job completion. Never skip more than one grit in your progression. Keep the floor sander's mantra in mind: I put scratches in the floor to get it flat; I take out the scratches I put in the floor to make it beautiful. Repeat.
A couple of quick points before I let you go: look, act and dress like a pro. This is important on every job, and even more so when you might be working in one half of the house while the customer is in the other half. Keep your truck and tools clean. Ask permission to use restrooms. Stay out of areas of the home that you don't need to be in. Clean up the job site every night; don't leave tools or equipment lying around (someone could get hurt). Last, never do something in someone else's home that you wouldn't want done in yours! Dude, you know what I'm talking about.
P.S.: The Madagascar cherry turned out to be santos mahogany, and it turned out beautiful.