Before I address the wood floor mysteries I mentioned in my last post, including the mystery about the spreading black spots, I thought it might be helpful to explain some of the tools I use on a regular basis when assessing wood flooring problems and how they work.
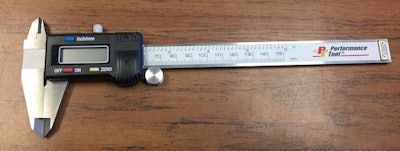
Digital vernier caliper: Used to measure consistency in milling specifications: thickness, width, and any variations and defects (e.g., planer snipe, swollen/shrunken material, etc.):

Combination square: Useful in determining that flooring material is "square" and meets dimensional standards outlined by the manufacturer and any guidelines to be adhered to by any governing bodies such as NOFMA, MFMA, etc.

Consumers often complain that their flooring was not milled square and that there are "wedges" throughout the wood floor installation. If a straight line is dropped onto the flooring in question and the floor shows a curve (like when an installer follows a crooked wall), all the "wedges" will point the same direction like pizza slices. If this is not the case, then the combination square will often show the material to be defective. This is prone to happen in the milling process if a run of flooring proceeds for hours with something off in the setup. It can be the same on the job site when, for example, a small piece of wood or other debris gets caught on the backstop of a crosscut saw, causing the cuts to be consistently out of square.
Thermohygrometer: Used to measure relative humidity. Measuring the job-site environment before, during and after an installation, and sometimes even before, during and after a finish job, is extremely important. I personally believe it should become the habit of every trained and knowledgeable hardwood floor installer. I do not believe, and neither does the NWFA, that any wood flooring pro is responsible to monitor living conditions of a home for the life of that home.

I like to leave this particular hygrometer before the installation and after I am long gone. It is a constant reminder to all that acclimation is a nebulous and constantly changing situation. There are too many events that can change the heat and humidity of any particular environment, internally and externally, that can drastically affect the dimensional stability of any flooring material or construction material in general. This meter clearly points out with colors: blue (do not install, too dry), green (good to go; 30%–50% RH and temperature just right—now move it!) and red (don't even think about it, humidity is too high!).
Keep in mind that we all hear that hot air rises, but you don't always hear that hotter air can hold larger amounts of moisture (water) than cold air. This is why the heat index for your local weather is based off of heat and moisture. They often tell us that it will be 85 degrees but with the humidity, it will feel 92!
Infrared thermometer: To look for "hot spots" in the flooring like heating ducts, how water pipes, and radiant heat:

Digital psychrometer: It determines RH by calculating the difference between its wet-bulb and dry-bulb thermometers:

Moisture meters:

From left to right: One analog (just to use as a variable meter; I am fond of it since it has served me well for many years).
One digital moisture meter with wood species settings.
One digital moisture meter with depth adjustment. Knowing what the moisture content of the top ¼-inch of the flooring is compared to the bottom ¾-inch, and then knowing the subfloor MC can be very revealing and helpful. Keep in mind that many inexpensive meters ($69-$139) are calibrated for Douglas fir and need a specific gravity (SG) conversion table. I could do an entire class on that, but let's just say the better the meter, the more accurate your findings.
Metal scanner: Heck yeah, baby! This one separates the men from the boys. Rare earth magnets are cute, but you light up this lil' baby with its digital signal and bright lights, and everyone in the room knows you know your stuff. The first words you will hear are, "WOW! The last guy didn't have one of those! What is it?" This tool will show the exact fastening schedule and sometimes even tell you what was used to hold the floor down. More importantly, it will tell me when someone ran an empty gun!

Concrete moisture meter: As important as it is expensive (around $600). This tells me everything I need to know about slabs and concrete foundations before, during, and YEARS after the concrete is poured. It leads me to leaks, moisture migration, capillary rises in moisture, sump pumps, hidden drain pipes and more:

Digital Microscope: This is only for the bada$$ floor geek! I use this extremely expensive, digital microscope with multi-power magnification that links to my computer. This can take photos and even video. When I have done tests in some of my technical writings, I use this tool to go where no inspector dares to go! I test underlayments for moisture control effectiveness, examine mold/mildew and metal particles, see details in defects in finishes … you name it. If I really want to dig deep into a product or problem, I have the guns to blaze!

Tape Measure: Last, but many times most important, is a standard-issue tape measure!

Learn this forevermore: The floor ALWAYS tells the story! Measure ten rows and then 20 rows. Here's an example for 3 1/4-inch flooring: 10 rows should measure 32.5 inches, and 20 rows should be 65 inches. If it does and the area is cupping, the floor was installed properly, and now there is moisture present causing compression. If the floor measures accurately and is gapping, the floor has become too dry and is shrinking. If the installation measures "heavy" (10 rows measure 32.375 inches or 1/8-inch strong, and 20 rows measure 65.25 inches), this tells you the floor was installed swollen, probably during a humid, hot month. If it measures "lean" (3.125 inches or 1/8-inch weak), this means the floor was installed during the heating season or when the RH level was low. The tape measure can keep you from driving out to a job site for no reason. Here's a simple tip: If you're installing and you do not have a bunch of expensive equipment (and you expect the flooring to be at "normal" living conditions after installation), only install a floor that measures as you purchased it! 2 1/4, 3 1/4, 5, 11 7/8 … whatever it is, the tape measure should give you a good place to start. [Editor's Note: See the article "One Way We Avoid Trouble: The 10-Board Measurement" for detailed info on this useful technique.]
These are just some of the tools I use, and many of you are probably familiar with them and others. Of course, the No. 1 I have is years of my own experience.
Have a great holiday season! Let's look at those messed up wood floor mysteries real soon. I will keep you all posted!