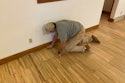

You get the anxious call from a homeowner who just bought a house in anew housing development. She loves the home, but is unhappy with the wood flooring. It has obvious wear patterns, scratches and scuffs. Now that she's about to host a black-tie dinner party, it seems unbearable. She doesn't know much about the history of the floor, just that the home was built two years ago. Before you agree to do the job or quote a price, youwisely decide to drive out to the house and see what you're dealing with.
At first glance, you notice micro-bevels, which tip you off that it's probably an engineered floor. You're familiar with other homes by the same builder in the subdivision that have similar floors with aluminum oxide finish. Upon further inspection, you notice the unsightly wear patterns and scratches in the finish the customer was lamenting about. Now it's up to you to deliver a fresh new floor before guests arrive. Her big soiree is in four days — can you revive this worn floor by then?
While many contractors may not face the dinner party dilemma, they increasingly have to tackle resanding or refinishing factory-finished floors. Some factory-finished floors are a solid 3-inch product with urethane finish. These floors can simply be sanded and finished using traditional methods. But newer types of engineered flooring with durable aluminum oxide and ceramic oxide finishes and paper-thin wear layers are becoming more prevalent, presenting a host of challenges to contractors. Here are some tips to help you add new life to a factory-finished floor and get the check signed on the bottom line.
Examine the wear
Look around the house and assess the wear of the floor to determine if you can simply recoat or if you need to get out the big machine. The simple guideline is that if wear is only in the finish, it can probably be padded/screened and recoated, while wear through the finish to bare wood requires resanding. Do a visual check and question the customer on maintenance of both the floor and the furniture on the floor. For example, overspray from furniture polish sprayed on the home owner's cherished hutch could cause adhesion problems during a recoat. If a scraped sample of finish balls up when you rub it between your fingers, then there's probably something contaminating the finish. If in doubt,do a test patch to be sure the finish will adhere. Also, inspect underneath the furniture for scratches and dents. If the home owner isn't using floor protectors, it may take lots of extra work to repair the floor.
A simple test to determine wear is to take a damp towel that's wrung out well and rub it over a worn area on the floor — this simulates a coat of polyurethane. If the worn area disappears,then most likely a recoat will suffice; if the area still looks bad, then you'll need to resand.
Other signs that the floor needs the big machine are deep scratches or gouges, exposed wood, pet and water stains, cupping and buckling. In cases of moisture damage, make sure the original moisture source is now eliminated. If there's severe damage, board replacements may be in order.
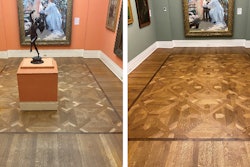
In many cases where the floor is visually unacceptable to the customer — if the surface is rough, has lost gloss or shows slight wear patterns — a recoat will be sufficient. A floor can be recoated an unlimited number of times, and factors such as wear layer thickness don't come into play. In most cases, you'll be able to recoat the floor using standard procedures.
Get the floor facts
Before you start any work, try to determine exactly what kind of floor was installed. Familiarize yourself with new products on the market. The more information you gather, the better off you'll be. The first step is to question the customer. The best-case scenario is to find out the manufacturer, brand and date of install. Manufacturers provide the best information on how to properly sand and finish their products. However, unless the original owner still occupies the home, it's unlikely this information will be available. At the very least, knowing the age of the home and floors may provide clues to the type of floor and finish.
Perform a quick visual check of the floors. A glance is all most experienced installers need to tell if the floor is prefinished or not. Floating floors are easily recognizable by their pattern of veneers glued onto long, wide strips. Instant tipoffs to engineered floors are beveled or micro-beveled edges and rotary-cut veneers, which usually have a rougher, plywood-type appearance. However, you can't always judge engineered products by their faces; many are now made from sliced veneers, making it almost impossible to distinguish them from the grain of solid products without looking below the surface.
To do this, you can either pull up a vent cover or remove molding around the perimeter. Either allows you to check the edges of the boards. If the floor is laid on a concrete slab and there are no vents, or there is insufficient expansion space, then you may need to remove a board to inspect beneath the surface. This may take extra time up front, but it could save aggravation, time and money when you work on the floor.
Determine the finish
If you're going with a simple recoat, this is the most important piece of information you need before starting the job. What's on that top layer determines the methods you use to restore the floor. One way to help determine the finish type is to take a scraping (in an inconspicuous place such as in a closet) and rub it between your finger and thumb. If it turns to powder, then it's a polyurethane finish. If it's a wax finish, mineral spirits applied to a white rag will typically rub both the finish and some of the stain off, leaving a yellowish color. If the test finds wax and the customer now wants a topcoat finish such as waterborne or oil-modified, the floor will have to be totally resanded. Although it may not be unheard of, resanding a waxed floor and applying topcoat finish is a crapshoot — there's always the risk for contamination and adhesion problems.
Another thing to watch out for is aluminum-oxide and ceramic-type finishes. They may take more effort and different products to recoat them successfully. (See "The Hard Truth" sidebar at bottom of this article)
The need for screen
If the floor doesn't need to be completely resanded, you have several options based on the floor manufacturer's and the finish manufacturer's recommendations. If the floor has a urethane finish, you can screen/pad and recoat almost as you would a job-site finished floor. When screening, use a fine screen and move to a coarser screen if the finer screens aren't aggressive enough. Using too sharp of a screen risks leaving swirl marks on the floor.
For pad and recoat jobs on engineered beveled floors, two maroon pads stacked on top of each other, along with a sandpaper strip system will abrade the surface uniformly and cut through the high beveled edges.
One option some finish manufacturers have created is a chemical sandless recoating system. This can be particularly useful for aluminum-oxide and ceramic oxide finishes (see "The Hard Truth" sidebar). The process of how the products work varies, but the end result is a chemical bond for the finish that the screen would normally create. These products work well in lieu of padding and recoating, but obviously can't remove scratches and gouges.
Determine the wear layer
If the wear on the floor indicates that a total resand is necessary, it's vital that you determine the wear layer thickness. If you don't, you could end up buying the customer a new floor. The only accurate method to measure the wearlayer is to pull up a vent cover and check below the surface. Some newer engineered factory-finished products have very thin wear layers that may barely allow one sanding with the big machine. Also, there are more products on the market that have only the thinnest of wood veneers — trying to sand them even once with the big machine would destroy the floor. Even solid floors, which typically allow up to seven sandings, may have little wear remaining, depending on how many times they've already been sanded and how aggressive the sanding technique was. If the wear layer is too thin, there may be little that can be done to the floor besides a simple recoat.
Start anew with sanding
If you need to sand a factory-finished floor, the sanding golden rule still applies: Always use the finest grit necessary to get the job done.
If your grit is too aggressive, you risk sanding through the veneer or down to the tongue and groove.
On some thin-veneered engineered products, the big machine may be too aggressive, so you may need to use a buffer with a hard plate and sanding disc or one of the other specialty sanding machines on the market. Some manufacturers offer oscillating sanders and triple-headed sanders that allow you to perform fine sanding procedures. You may find these machines work best for such floors because they apply less pressure while still allowing enough of a cut.
Bevels also are a factor in determining how aggressive your sandpaper will be. Micro bevels can be sanded right out, but deeper bevels may not sand uniformly, causing problems when applying the finish. If the floor has a v-groove, your best bet is to hand-scrape out the bevels.
Finish it off
The finishing technique for factory finished floors can require special precautions. At the factory, such products generally have multiple (up to seven or more) light coats of finish, rather than the two or three relatively heavy coats typical of site-finished floors. Also, some floors are prefinished first and later cut, leaving exposed wood. This means that applying two heavy coats of waterbased finish could trap water in the unfinished grain, causing the boards to swell. One way to combat this problemis to use a painter's pad for the first coat of water-based finish. This can help apply a lighter first coat of finish and seal up the ends.
Another challenge with finishing engineered floors is finish pooling up in the bevels and v-grooves. Using an appropriate brush or painter pad for the first coat of finish can help prevent that. This may take a bit more time, but the end result will be worth it.
So what about that floor at the beginning of the story? Can the contractor save the day by restoring the floor to like-new condition in the four days before the party? If the the floor wear is minimal, and the floor hasn't been contaminated with maintenance products, then an abrade and recoat can be accomplished in as little as a single day. Depending ont he type of finish used, the guests maybe able to dance on the floors a few days later.
Information for this article was provided by Don Connor, Harris-Tarkett; Galen Fitzel, 3M Construction and Home Improvement; Todd McDonald, Basic Coatings; Neil Moss, Triangle Pacific; and Todd Schutte, BonaKemi USA.
The Hard Truth
Many floors installed in the last three to fours years may contain layers of aluminum-oxide or ceramic-oxide finishes. While these finishes are marketed to the consumer to withstand almost anything, contractors are left with the challenge of trying to abrade them for recoats. This isn’t impossible, as many believe, but there are special techniques and equipment that can make the daunting task a little easier.
First, try to identify the finish. Because the finish itself is an abrasive, you may be able to notice tiny particles in the finish. Other telltale signs are a ropy, string-like pattern in the finish and a slight grayish tint. When dealing with these finishes, it’s helpful to know the manufacturer and brand of the floor. Not all factory-finished floors with these types of finishes are the same. The coating sequence and ingredients in the top coat of finish can vary. Factory-finished floors have several coats, some consisting entirely of aluminum oxide-type finishes, and others having a traditional urethane finish on the top layer. Knowing the finish sequence can save you time, materials and aggravation.
Another factor to keep in mind when dealing with aluminum- or ceramic-oxide finishes is the extra labor and materials needed when estimating the job. Typically, floors with these finishes require one-third more sandpaper and take two to three times longer. This means in order to cover costs, jobs should typically be bid 30 to 40 percent higher than similar jobs with traditional finish.
Here are some general guidelines to help you refinish aluminum oxide and ceramic-oxide floors. However, above all else, be sure to follow the flooring and finish manufacturers’ recommendations.
Resanding: Because you are essentially grinding abrasive in the finish with abrasive in the sandpaper, it’s going to be tougher to get a decent cut. A good rule of thumb is to start with 80- or even 100-grit sandpaper, which opens up the top layer of the finish. Once the finish is removed, then you can drop down to a 50- or 60-grit sandpaper and work your way back up.
Screening and recoating: You need a sharp screen just to cut into the abrasive finish, but if the screen is too sharp, you risk the buffer grinding swirl marks into the floor. And, if you leave too deep of a scratch, the finish may not hide the swirl marks. If you’re going to use a traditional screen and recoat system, start with a fine-grit screen, such as 120- or 150-grit, and work your way up if you need a more aggressive screen to abrade the floor. The easiest option may be a sandless chemical recoat system.
Aesthetic Warranty?
Many factory-finished hardwood floor manufacturers are touting warranties that last longer than the Ice Age. It’s important that the home owner understand that these are “wear-through” warranties and not “look-bad” warranties. It’s true that today’s finishes are tougher than ever, but they are not impervious. The floors are abrasion-resistant, not abrasion-proof. Traffic patterns and other wear marks can still appear in the finish. The floors also can be susceptible to moisture and stains. This means that many customers will want to have their floors recoated during the warranty period. The problem is that part of the manufacturer’s warranty will be invalidated once the floor is refinished. The best bet is to contact the manufacturer and get the warranty specifics before you do any work on the floor. If the customer still wants the floor recoated, be sure she understands that the warranty will probably be null and void once your abrasive or finish touches the floor.