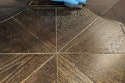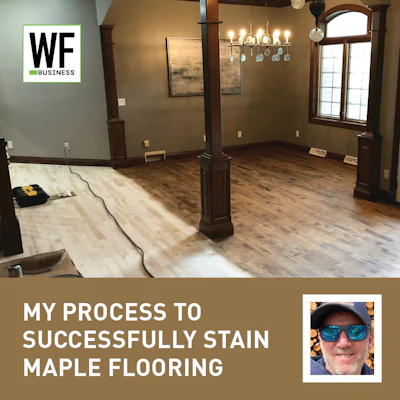
Staining maple can be nerve wracking, to say the least, no matter how much experience one has. In our area in Green Bay, Wis., close to the heart of the maple flooring industry, we deal with many existing maple wood floors, as well as new installations, so learning to work well with maple is simply a part of our daily lives. Here is how I go about staining when I’m dealing with a maple floor.
I set expectations
The moment the customer says “I would like to stain it” is the moment you need to start setting the expectations with that customer. I was taught to make the customer aware of what a stained maple may look like before you do the job. Otherwise, if they question it afterwards, whatever you say might be viewed as an excuse for your craftsmanship. I explain to the customer that maple is such a tight-grained wood with very small pores, and its density varies and can look “marbled.” Once you get past this understanding with the customer, the final outcome is in the details from then on.
RELATED: Today’s Wood Flooring Stains: What You Need to Know
I have good equipment
Once the sanding process begins, I am now focused on my equipment and making sure it is functioning properly. I can’t express enough how important it is to make sure the big machine and the edger are properly set up and functioning like they are supposed to. Stain applied to a maple (or any other species) makes even minor flaws in your sanding jobs visible—I’m talking about flaws that would be undetectable in a clear or natural-finished floor. If the equipment is not operating properly or not set accordingly, you’re already at a disadvantage.
I do two passes with the big machine
I like to run the big machine for at least two passes on the floor before I go to the planetary. Usually I will go with a 40-grit followed by 60-grit. The edges will be sanded with the exact same sequence as the big machine. When running the big machine over the floor twice, you should now have a good idea where undulations or areas that have high and low spots from foundations that have sunk, or sagging floors, may be. As we all know, our sanding equipment is designed to cut floors flat!
I sand with good lighting
As I mentioned, the sanding marks will be very visible when stain is applied. Sanding with a light to identify these areas and marking them with a pencil allows me to go back and sand out any big machine marks or the cross-grain scratches that tend to be left by the edger. To make sure these sanding marks are erased, I will go to my trusty Festool RO 150 random orbital sander with 80-grit Multi Air paper and an LED light placed ahead of my sanding direction and watch the scratches disappear.
I use a planetary sander
Once the big machine work is done, it’s time to bring in my planetary sander. There are many options for planetary sanders and new abrasives these days—here’s what my routine is. Running 80-grit Red Heat paper on the Trio followed by 100-grit Red Heat paper with the weight ring in place on the Trio is my go-to. Once the Trio work is done, I like to break out the Bona Multidisc and blend everything using Norton Mesh in 100-grit (in my opinion, the Mesh has been a game-changer). I have noticed through trial and error that if I skip the 100-grit on the Trio and simply go to the 100-grit Mesh on the Multidisc, the 80-grit scratches from the Trio are still visible. You can get away with skipping the 100-grit on the Trio on a clear or natural finished floor, but no way will this be acceptable on a stained maple. Well, at least not acceptable for my standards. Again, I use my Festool to sand the edges with the same sequence.
I take my time with sanding
Overall, it’s important to take your time when sanding maple that will be stained. Vacuum the floor after each grit sequence—never underestimate a good vacuum job. Make sure your corners are scraped thoroughly and, like I said, go over the area with an LED light and check that all the sanding marks are gone before the stain is applied.
RELATED: Get a Handle on Wood Floor Staining Strategies
I water-pop
Water-pop! Every professional has their own opinion about this step, but I swear by it. Opening up the pores of the wood after you just closed them off with high-grit sanding just seems to make sense. I never water-pop and apply stain on the same day—I feel you’re just asking for trouble.
I make sure stain application is consistent
How to apply the stain is another thing that professionals have strong opinions about. Some like to apply it by hand, as they feel they get a more consistent application. I’ve done it both by hand and by buffing it on, and I really don’t see a difference in consistency, so now I buff it on with a carpet pad. I have found that the type of carpet fiber used does make a difference, though. I buff on with a frieze or cut-pile carpet pieces with tightly twisted fibers; I don’t recommend Berber-type carpet pieces.
Know how to work with the specific stain you’re using
There are three stain brands I have used, and all three, if applied properly, will give you and your customer excellent results. Some companies have more colors and some are easier to apply. If you need to figure out a custom color or need help with application techniques, or you need to extend dry times, don’t hesitate to reach out to your rep for help.
Choose the look of your sealer
Once the stain has dried, I like to apply oil-based sealer over the top. I didn’t always do this, but I started when my mentor Matt Thrane from Gehl Flooring suggested using it to give the floor a “bolder” look, and I haven’t looked back since. I have applied water-based sealers, and the results have been good, too. Really it comes down to the visual that you and, more importantly, your customer are looking for.
As with any job, your goal is to make sure the customer is happy and you are never on the hook for a resand. Charge accordingly, because sanding and staining maple is not the same as sanding and refinishing a natural-finished oak floor. Anyone who has stained maple knows what I’m talking about! Will you make mistakes? Probably, but learn from them, just like I did.
RELATED: Wood Floor Sanding 101, Part 1
Now take a quiz on what you've read: