


Today's hardwood flooring professional has to be able to measure jobs under all types of circumstances—like from the outside of the home when the general contractor is stuck in traffic and could be delayed for hours (yes, I live in Los Angeles), or when other trades are in full work mode, making changes as you measure. Or when you're told, "That wall won't actually be there," or, "We're moving this wall out here," and the GC is using his toe to show you the new dimensions. Or, how about measuring in a house jammed with furniture, kids, and pets (and questions that never stop while you're trying to get measurements)? The ideal condition is an empty home, free of debris, where you can just get length and width, write it down, and be on your way. The next-best way, although it can be intimidating for some wood flooring contractors, is getting measurements from blueprints.
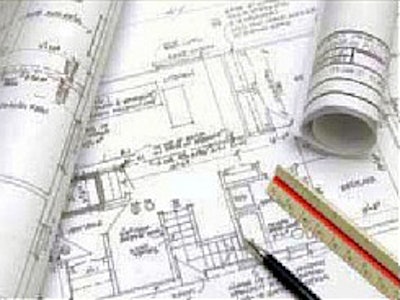
How I Handle Printed Blueprints
I believe blueprints stopped being blue just about the time I started in this industry—about 1976. Reading them can be a bit of a chore if you don't know how to begin. First and foremost, invest in an architect's scale. Drawings are scaled to represent the actual home size: 1/4" = 1' or 3/16" = 1'. You can get your measurements with a tape measure or a ruler, but an architect's scale is already calibrated for multiple options. You just coordinate it to the listed scale, usually on the bottom righthand side of the drawing, and you're off.
1) Look for an index of drawings. In the index, I'm searching for the "finish schedule." This schedule lists types of floor coverings. Check the index for the abbreviations, which are not universal. Typically, it will include something like: c= carpet, t= tile, s= stone, wd= wood floors, vct= vinyl composition tile, as well as abbreviations for wall finishes, door types, ceiling finishes and other items. With my measurement sheet in hand, each time I see "wd," I look for which room is listed and record that room, leaving space to fill in the measurements later.
2) Find the finish floor plan. This will be in the "A" pages. "A" pages are architectural, "M" pages are mechanical, and "S" pages are structural.
3) Find the rooms that you listed from the finish schedule and measure. As you find each room on your list, rotate the architectural scale to coordinate with the listed scale, and start measuring your dimensions. As you're going along, the rooms you listed should indicate "wd" near the room name or number. If you get to a room not on your list that says "wd" on the drawing, you need to submit a RFI (Request For Information) to the architect (if the GC can't clear up any conflicting information). Now you're almost done.
4) Look for the "D" within a circle. When you're going along measuring rooms, as your wood floor meets another floor covering, there may be a symbol consisting of a circle with a darkened arrow point at the top; within the circle is the letter "D" and a number. This means someone has already specified how that floor is going to tie into another floorcovering, and he wants you to see those specs, which you'll find on the "Details" page. Find the Details page, look for your number, and make a note to follow exactly the specified transition, because when this job is over, the last thing you want to do is a repair (or repairs). You want to pick up that check, meet with another GC and be asked to look at his blueprints.
Line Types
You'll find it helpful to keep the following in mind when you're looking at either printed or electronic blueprints:
• Hidden line: Medium-weight, composed of short dashes. Represents an edge that exists but is blocked from view.

• Object line: Heavy, continuous line. Represents main outline of the features of the objects and walls.

• Cutting-plane lines: Marks the part of the drawing being "cut" to create a sectional view. Walls of floor plans should be comprised of cutting-plane lines with cross hatch lines between them.

• Cross-hatch lines: Thin lines usually drawn at a 45° angle.
• In a sectional view: Used to show material that has been "cut" by the cutting plane line.
• On a floor plan: Used to represent a specific building material or walls that have been "cut" (check the legend).

Handling Electronic Blueprints
By Merrisa Gonzalez
The first step to understanding blueprints is knowing exactly what to look for. Navigating through a long list of electronic files can be a bit overwhelming when you don't know which documents you need to look for, and printing out all the files is unnecessary and can be expensive. The second step is knowing how to read the documents you need. Reading blueprints begins with an understanding of scale, line types, and line weights (see sidebar at left). Hopefully, these steps will help you find your own rhythm when measuring your own plan takeoffs.
Step 1: Look for the overall floor plans, finish floor plan, dimension floor plans, and finish schedule. The majority of the information will be found in the "A" (architectural) section of the plans. Other sections to be aware of are "M" (mechanical) and "S" (structural). For electronic files, each page (as you see it in a set of construction documents) will be its own file. This is generally the same for files on CDs, files through e-mail, and online electronic file sharing systems.
Step 2: Download only the files with floor plans and finish schedules. You can always go back later and download additional files if needed.
Step 3: Find the areas that call for wood flooring. Do this by looking through the finish schedules and the finish floor plans. Make a list of the room names and numbers.
Step 4: Save the electronic file as either a JPEG or TIF F file and insert the files into AutoCAD. Draw a reference line that is as long as one of the walls' actual dimensions.(You can find these dimensions in the dimensions plan.)
Step 5: Scale the drawings. Instead of using the dimensions found on the dimension plan, which are usually from the outside of the wall to the inside of the wall, I scale the drawings myself and only calculate the dimensions from the inside of the walls. This provides for a more accurate square footage calculation.
To scale these drawings, I draw polylines around the areas that call for wood flooring. I then list the polylines, which calculates the square footage for me.
The best way I found to scale electronic files is by using a drafting program such as AutoCAD. Otherwise, if you have access to a hard copy, I suggest going that route. If your company has a plotter, you can scale the drawings and plot them out instead of dealing with a computer screen. Hard copies are truly the best way to go.
As a subcontractor, wood flooring companies do not need all the details that construction documents cover, so having a full set of plans is not necessary. Just remember to recycle!


