
I have this problem … I am really good at watching, analyzing and dissecting people's performance (and my own).
I occasionally get these installers who have been doing floors for years and want to do advanced installations but are lacking the basics (example: Why in the world are you putting this sappy board in my floor?). By the time I'm done telling them what they are doing wrong and what they can improve, they usually feel pretty bad. Some try to apply my suggestions, some don't. It is very hard to change and I understand that. I am sure you are good at what you do, but try to keep an open mind and read through this review as if you never installed a floor in your life.
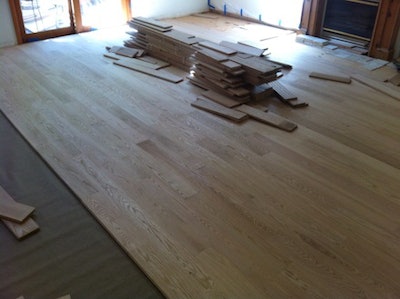
Many of us think that a straight layout of a ¾" (1.905 cm) oak nail-down floor is very simple. I agree that it is simple, but it is still made of a ton of details. Let's see how detailed it can be. I will start this review after you completed the subfloor preparation and you are ready to lay paper (vapor retarder):
- Overlap your paper and staple it to the subfloor. It is easier to install if the overlap seam is with the direction of the installation. That way floor boards don't get caught in the seam, lift and tear it.
- When you staple the paper, make sure it is flat on the subfloor. If it has a wave, chances are you will have to cut it out by the time you compress the paper under the floor.
- The staples that hold the paper down need to sit flat on the subfloor. (See this post on Roy's Inspector Blog.)
- Snap a chalk line measured from the longest, straightest wall. That is usually an exterior wall. When you snap the line, make sure the string snapped on the marks you made. Close enough (within a 1/32" or .793 mm) is probably okay for a straight layout in a small rectangular room. Caution: If you get too used to "close enough," that's all you will ever be: close enough but not quite there. Then you install a patterned floor and oops, your "close enough" multiplied itself to not good enough. My point? Know when to obsess with the details and when not.
- Nail your first row using long, straight boards. Can you use short, crooked boards? Yes, but try to make life easier on yourself-please. Face-nail and blind-nail the first row.
- Face-nailing: Don't nail with the nail gun driver parallel to the grain. Chances are if you're doing that close to the end joint, the board will split. Don't face-nail into or next to a knot. Counter-sink nails that are sticking above the face of the floor. Why? Because when it is time to sand the edges you forget they are there and then, oops, time for a new edger pad.
- Don't put too many or too few nails in the floor.
- Use fasteners from a reputable source. I use cleats and nails made in the U.S. I remember a delivery on one of my job sites showing up with the wood floor and a cardboard box of cleats. The box had no label on it, just a stamp saying "Made in xxxx". I sent it back. Ever heard of installers using cheap fasteners and then having problems?
- Okay, first row is done. Now it is time to rack out the floor. Place a few bundles at a time in front of you. Put them down so that the tongue is facing in the correct direction. Most unfinished bundles are arranged in a way that most layers are facing in the same direction. This way all you have to do is grab a board and place it on the subfloor without having to rotate it.
- Do not, I repeat, do not take your tape measure out while racking. You need to be able to eyeball the length you need. Scan the bundles like an eagle and find that board. That is it. A tape measure slows you down and upsets me, so keep it in the tool box for now.
- When racking the floor, make sure you leave a space between your last nailed row and the first row that you rack. Why? You'll find out when you start nailing again. You need that space so that you can fit your nailer in there.
- At the end of every row you will have to cut the last board (no tape measure, please). Leave that board facing the opposite direction of the floor. Meaning, if your entire floor has the tongue facing east then all your last boards (which will need to be cut to fit) will have their tongue face west.
- When choosing boards at the end of a row, choose wisely. Make sure your cut-off is either waste (very and I mean very short cut-off piece) or a long enough piece to use as a starter in a different row. If you get used to having cut-offs that are borderline long enough to use in the floor you will run short on material.
Now it is time to stand up (I hope you were on your knees racking the floor) and nail the floor. I will continue this review on the next post. Thanks for reading, and Happy New Year!