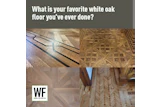
Keith Long with Thunderheart Flooring here to continue on the How We Did the Hand-Scraped Walnut Herringbone, Part 1.

John Kimminau and I decided to run the rows of herringbone east to west. We found the center of the room and snapped a chalk line. Then, we got out a copy of Charles Peterson with Andy Engel's book Wood Flooring: A Complete Guide to Layout, Installation & Finishing. The authors have gone to great lengths to spell out in detail many of the aspects of hardwood flooring, with a plethora of photographs. In my opinion, it's well worth the price-I've referred to it on many occasions. Also, homeowners can peruse it to get ideas as to which patterns of custom flooring suit them.

We calculated that our six-tier border would be 20 ¾ inches wide, so we measured back from the walls and snapped chalk lines to have a frame of reference as to where the field would terminate and the border would begin. John lined out the pattern and found that we would end nicely. Full-length pieces of herringbone could be cut into thirds and fit in nicely to finish off the two sides.

When installing herringbone, if the desired look is to have the pattern end the same on both sides, the chalk line that marks the center of the room should run through the center of the width of the pieces coming together to form the first two rows. With these two rows set on 45-degree angles, tying in on each other, the appropriate measurements away from the center line can be marked and measured. These measurements, which will be the same, can be transferred down either side of the center line, to be used as reference lines while laying the first two rows of flooring. These outside lines indicate where the outside tips of the herringbone pieces should terminate while installing.

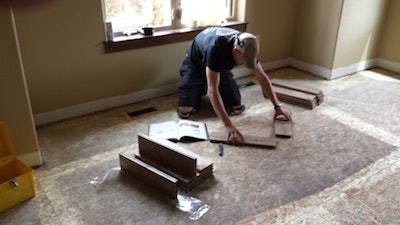
Notice on the above picture how John is screwing down a backer board. This set us up for success to start the installation absolutely straight and true. The two edges of the backer board that face the field are factory edges of some leftover walnut plywood from a previous job. Knowing that is a true 90-degree angle, we squared it up and fastened it in place. I'd like to call to your attention that we set it on one of the outside lines, not the center:

It doesn't matter which of the outside lines the backer board gets trued up to, just so long as it's one of the outside lines. This way, the outside tips of the herringbone pieces end exactly on the outside lines, while the center of the widths of the pieces are precisely on the middle line, which is the centerline of the room. We opted to set the backer board into the field far enough so the first boards laid down were in pattern, but their tail ends just cleared where we would cut off for the border. The last couple pieces were glued and backfilled with partial pieces once the backer board was removed. The same was true for each time we turned a row around and went back the other direction-it's much less waste to use a partial piece where needed instead of burning up a full length piece of herringbone, just to cut the majority of it off when preparing for the border.

Ahhh … the pattern running straight and true! This in the third herringbone I've been a part of installing for the public, and it's always been a good feeling to be at this point during the install. Everything is plumb and true, and things start to materialize. On the two previous jobs, I also glued and nailed, but at this stage would trowel out a whole row of glue at a time, then install and finish-nail the pieces of that row in. Once in awhile, the air hose would get in the glue, then on the wood. When sanding the floor afterwards, that's not a big deal. Since this particular job was hand-scraped, and what you see going down is the finished product, I buttered up the bottom of each piece with a 3/8-inch V-notch trowel, while John installed.
After cutting the herringbone to length, Robin had passed all four sides through a router station. We made the entire pattern tongue and groove with spline while we installed the field. I like to buy spline 1,000 linear feet at a time, and do so multiple times a year. It feels as if through the years I've purchased enough adhesive to put more than one glue manufacturers' children through college, but I wouldn't have it any other way. This floor John, Robin and I put in is there to stay. Since Robin set the router station up to put the groove in at the same height as a ¾ inch thick floor, but this floor is 15/16 inch thick, the wear layer is incredibly thick. It has a noticeably different feel when walked on.
Let's meet up next week to complete installation of the field, mark out and cut off for the border, and review the border pattern. Until then, stay sharp!