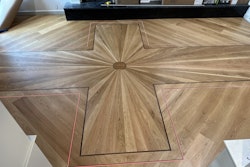
Hidey-ho, partners, Keith Long here with Thunderheart Flooring to finish up the double picture frame border project we started in the last post.
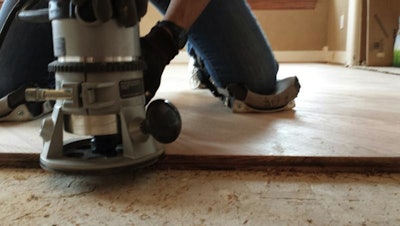
After having cut the perimeter of the field with the Festool TS 55 track saw, we removed the excess wood and underlayment paper. I don’t bother putting a real thorough cleaning to where the border will go just yet—instead, I broom any impurities from the field into the channel where the border will go, and run a D-handled router with a groove bit on it around the perimeter:
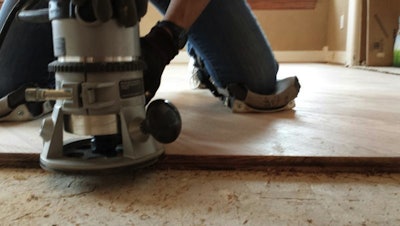
Between my wife and I, one of us runs the router while the other keeps a vacuum wand running alongside it. If the bit is sharp, I’ve found we can contain most of the dust this way. If certain jobs require as much dust containment as possible, I do have a Festool router that hooks up to dust containment, but I don’t bring it to every installation job. I suppose there are differing opinions on this subject. However, my point is that when breaking into the custom installation scene, there are plenty of tools to drop money on. Don’t feel as if you must have dust containment on everything right away. Different parts of the country seem to have different norms on this subject. I talk with potential clients about their expectations concerning dust and many other things before submitting a bid.
If there are quite a few linear feet that need to be routered, I’ll give the router a rest and let the bit cool down periodically. I’m under the impression it’s the heat generated that trashes out router bits, so I set the tooling up for success by doing something else for a couple minutes while it has a chance to cool back down. These bits can last for several jobs if they don’t hit anything and get marred up.
After a thorough cleaning of the entire floor, we put Titebond and spline in this newly created groove, and fastened it in with 2-inch, 15-gauge finish nails. It’s been brought to my attention that since we cleated the field of the floor, that a palm nailer (a hand-held pneumatic tool that administers a single cleat at a time) could be used in the places we’ve been using finish nails. This way, the whole floor can be cleats. Great suggestion, Joshua Crossman—I took your advice, and the palm nailer I ordered arrived yesterday!
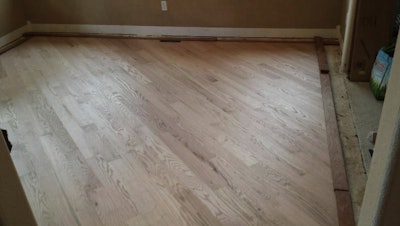
Ahhhh… now for one of the fun parts! Robin and I both enjoy opening bundles and spreading out pieces when doing border or custom inlay work. Finding the right length, color, and grain orientation to make everything appear pleasing to the eye is a challenge that we enjoy.
The first row on this job was 3-inch jatoba (Brazilian cherry), while the second and final row was 5-inch #1 red oak. Although the possibilities of color combinations and widths are only limited by the imagination when doing this kind of work, Robin and I have found that certain species complement one another, while others can create discord when put together. Jatoba and red oak seem to go well together, as do santos mahogany and red oak. Ipé (Brazilian walnut) seems to go better with white oak and hickory, as does black walnut. One of our favorite color combinations is black walnut and maple—those two species together really pop, in our opinion.
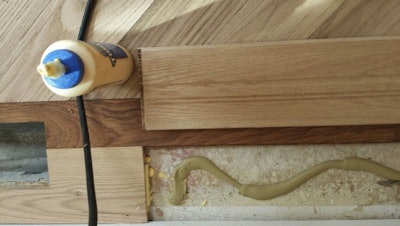
We are meticulous when it comes to fitting everything tongue and groove, mainly because we can, and we know that the end result is desirable. With the vast array of adhesives we have access to these days, glue may be sufficient. It sure doesn’t hurt anything to make it all tongue and groove, so while we’re at the saw to make cuts for the border, we groove all the angled cuts, then cut down spline to length to join these miters. These small splined joints are good places to hide fasteners that won’t be seen. For the 3-inch portion of this double picture frame border, no face nails are necessary—the fasteners can be blind-nailed through the tongue, and are hidden from sight.
The above picture illustrates how to fit the last board in a run and still keep things tongue and groove. Spline with glue and a fastener was added to the groove side of the already installed board along the 5-inch width. On the board that was yet to be installed, we cut it to length, groove-routed the end that was to interface the spline, and then removed the bottom side of the grooves on both 5-inch sides of the board. After adhesive on the subfloor and Titebond on the 5-inch tongues and along the tongue of the 3-inch jatoba, we inserted the board and wedged with 22.5-degree wood wedges (created on the miter saw from scrap flooring) between it and the wall until the glue dried. This way, no face nails are needed.
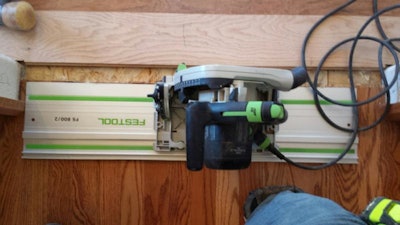
Along the same lines of keeping everything tongue and groove, to marry our border to the existing floor, we tidied up the line of the flooring that was already there with the Festool TS55 track saw and guide rail, pictured above. Although there are many choices for track length, this 30-inch track comes in handy in tight conditions such as these. After using an oscillating saw to continue this new straight line to the ends where the track saw won’t go, we put a groove in the existing flooring to accept spline:
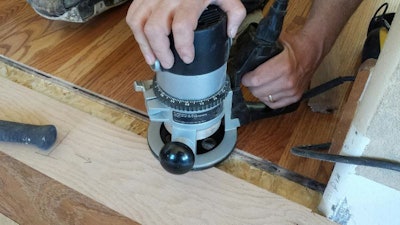
This D-handle has really simplified routering for us while out on job sites. We have one dedicated for groove routering, and another with a roundover bit to transition to other floor coverings of varying heights. If a person has a router with a standard base, most of them are compatible with a D-handle, which can be purchased separately for a reasonable sum.
After ripping a piece of jatoba to width, I groove routed the length, and undercut the bottom sides of the grooves with the table saw. After adhesive on the subfloor and Titebond on the tongues of both the 5-inch red oak and the newly created spline generated on the existing floor side, we spoke real sweet to that last piece and eased it into place:
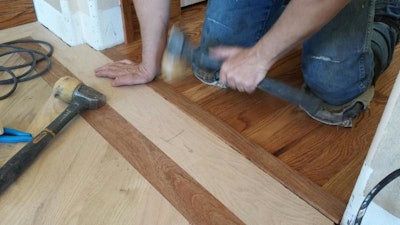
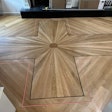
We do this type of field with bordering on a regular basis. It can really make one room pop, while the rest of the floor can still be laid straight. On this particular job, we also converted the living room from carpet to hardwood, and bordered it, too. There was a 2-foot-wide-by-7-foot-long jig-jog in the floor that the homeowners were concerned would look strange to them if the border followed around it. So, they drew up a design they thought would go well there, and I brought an array of exotic woods from my shop.
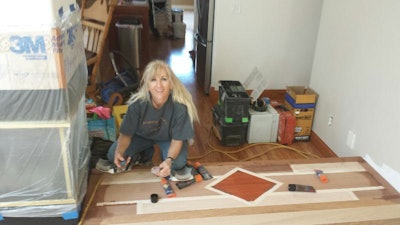
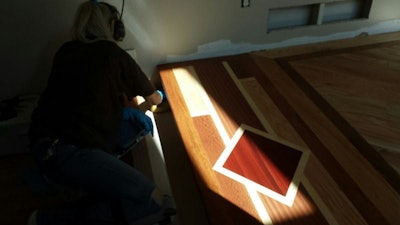
Robin has a real eye for color. It was fun listening to her and the homeowners discuss which species would go well where. Padauk for the center diamond, maple for highlights, a sapele belt running through the middle, and lacewood (leopardwood), with jatoba and red oak interspersed to tie into the field; we had a great time bringing their ideas to fruition.
While putting up blog posts so far, I’ve focused on installation techniques. I am planning on branching out and doing some posts on my sanding techniques and my philosophies on business, while still doing posts on installation techniques. My reasoning is to put information out there that can help contractors become well rounded, myself included.
Your questions, comments, and suggestions are welcome. Thanks for reading, and stay sharp!


