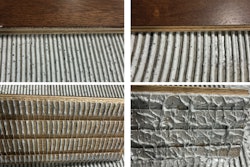
Many years ago, I hired a new installer who said he had experience in the trade. I went to the job and found him nailing away. Noticing dime- and quarter-sized gaps in a select-and-better floor,
I asked why he wasn’t pulling the boards up tight. He smiled and told me it slowed him down and, after all, “Filler’s killer, dude.” For obvious reasons, he only lasted part of one day. Let’s go over some basics when it comes to using filler for wood flooring.
Types of filler
There are a lot of choices out there today compared to when I started. We usually saved edger dust and mixed it with lacquer sanding sealer. It had several unique qualities: It did a good job of matching colors and filling even small gaps, and it got you higher than a kite! Certainly, I don’t recommend doing that now. We would mix white carpenter glue with dust for small chips or gaps, which did a pretty good job, as well. Now, you can buy latex-based, ready-to-use trowel fill or patch for smaller issues. Another option is buying the powder and mixing it with water as needed. There are water-based additives that you mix with fine wood dust and wood flour types of filler (read the ingredients and decide if you want to use them—and if you do use them, use all the PPE recommended on the SDS). There are also oil-based color match putties for filling nail holes, but keep in mind they never get hard.
To fill or not to fill?
That is the question. If you sand a floor in a climate with a heating season, you may not want to fill gaps during winter, as the filler will be pushed out in spring and summer. On the other hand, if you fill gaps in the summer and the floor shrinks in the heating season, the filler will crack, crumble and look awful.
If you encounter a condition with large permanent gaps, you can address them by inserting slivers, aka using the Dutchman technique. In some situations, filling is essential, such as when you are doing 5/16-inch fingerblock parquet and/or paper-faced parquet patterns. We don’t see them much anymore, but they are out there.
Last, but certainly not least, know that some out-of-the-pail fillers will not always keep their color over time, and they cannot be bleached or used with reactive stain processes, or take stain at all. Like always, read labels, ask questions, and be informed before using a filler that may cause you grief down the road. Happy sanding!
Find all of Bob Goldstein's popular WFB articles here.
 Tom Farquhar


