
When I worked in New York and New Jersey, soundproofing never seemed to be an issue, but here in Miami, it's extremely common. It's usually required in high-rises, and we also do a lot of soundproofing in two-story homes (the truss construction used here can be noisy without soundproofing). This project was a two-story home in South Florida. About 95 percent of homes here have a concrete slab on the first floor; some older homes have crawlspaces. The second floor can be a 4-inch slab or plywood over trusses 24 inches apart. In this case, it was trusses and 5/8 -inch plywood. Our clients specified that they wanted soundproofing to minimize the sound from the second floor; the only way to do that with solid wood flooring was to lay our soundproofing using a "floating subfloor" method, consisting of one layer of soundproofing, two layers of 3/8 -inch or 1/2 -inch CDX or equal plywood, and wood floors nailed over the floating subfloor to create a complete floating floor system. (For more on soundproofing, read "Underlying Truth" in the August/September 2008 issue of Hardwood Floors.)
SUPPLY LIST
• Cleaning supplies (broom, vacuum, garbage bags, dust pan)
• Straightedge and level
• Drill, staple gun, hoses and air compressor
• Wooden shims
• Door jamb saw or hand saw
• Adhesive (such as Liquid Nails, PL400 or similar)
• Sander and planer
• Soundproofing material
• Clear tape or duct tape (for seams)
• Asphalt-saturated felt paper
• Plywood
• Circular saw and extension cord
• Chalk line
• T-square, pencil, and tape measure
Step 1

The upstairs on this project had carpeting in a loft, hallway and three bedrooms, and tile in a bathroom and laundry room. Before we remove furniture, we inspect everything for existing damage and take pictures of the damage. We also take pictures of the layout of the rooms so it will be easier to remember where everything goes when we put it back.
Step 2

We remove the carpeting, base moldings, doors, closet shelving, etc.; cut the door jambs; and clean the floor.
Step 3

Using a straightedge (preferably one 10 feet long) we check the subfloors for flatness (not "level"). For plywood, the subfloors should be within 3/16 inch in a 10-foot radius. Minor imperfections can be sanded down.
Step 4

In this area we decided to use wooden shims and 2-by-4s; we sliced the 2-by-4s down to get the desired thickness to make the subfloors flat. We glued and screwed the shims and 2-by-4s down 16 inches on center. We also laid one layer of 15-pound felt paper as our moisture retarder, always overlapping it by 4 inches.
Step 5

In this particular area of the subfloor in the loft, where the trusses changed direction, the subfloor was so bad that we had to remove the existing plywood, shave some of the beams and shim others.
Step 6

The areas close to the wall had settled, so we had to use some shims to bring the height of the plywood up to meet our new subfloors.
Step 7

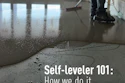
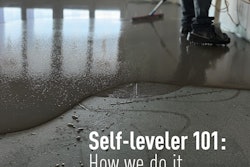
This specific type of soundproofing is a polyurethane foam; it has an IIC of 60, a STC of 54 and a 0.46 water vapor transmission rate. It's also antimicrobial and is only 1/8 -inch thick. Tape the seams, and be sure to not overlap them. We always take pictures of the soundproofing as it's being installed, making sure there's a reference point for that particular room in the photo.
Step 8

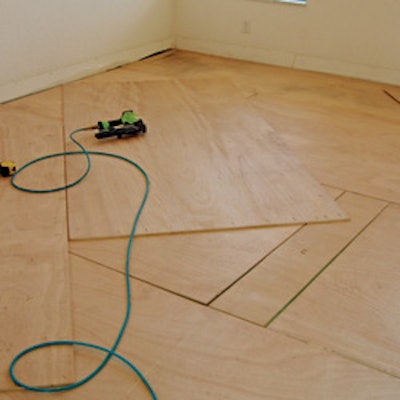
Now we start loose-laying the first sheet of plywood, keeping a distance of 1/2 inch between the sheets, and 3/4 inch off the walls and other permanent vertical structures.
Step 9

Next we lay the second sheet of plywood in a diagonal from the first layer, keeping a space of 1/4 inch to 1/2 inch between the sheets and 3/4 inch off walls and other vertical structures. Use a staple gun or screws to secure the plywood, but make sure that the staples or screws are not longer than the two layers of plywood combined.
Step 10

Now we lay one more layer of felt paper (that will help minimize squeaks) and start nailing the floors. We are careful to keep a 3/4 -inch gap at any walls and vertical structures (this is very important for sound reduction).
Sound Control TipsSimply installing soundproofing material does not guarantee that it will work. The correct installation and right STC and IIC for that project is crucial. With soundproofing, always remember: • Run the soundproofing up the walls and other vertical structures at least as high as the flooring will go. • Do not attach the subfloor or the floors to the structure of the building. • Leave 3/4 to 1 inch at walls or any permanent vertical structure. • Glue any molding (stair nosing, threshold, etc., instead of using nails. • When installing base moldings, cut the bottom of the base at 5 to 10 degrees to eliminate full contact with the floors. If using shoe moldings, try nailing in to the walls instead of down in to the floors. • Leave a small gap between the moldings and floor (including the door jambs). |