I've always preferred glue-down installs. Just as some guys fly through nail-downs or floating floor installs, I tend to be the fastest at glue-downs. This comes in handy, as almost 99% of the installations we do in the Vancouver area are engineered wood floors (most often European oak or red oak). I've found other benefits with glue-down as well, such as fewer squeaks over time and the moisture protection many glues offer today. After doing so many glue-down installations, and learning from mentors early on, I've picked up a few glue-down tricks that help me work quickly, save adhesive and keep my boards clean.
1) Snap chalk lines for spreads of adhesive
I always snap out 2-foot sections with chalk lines before I start installing. This creates organized sections that ensure you're installing before the glue flashes over. I typically am using either urethane adhesive or silane-based adhesive, and I always want the adhesive to be fresh when I'm putting boards down. When I stop a section, I measure it so the lines are not past where the tongue of the material stops. This saves a lot of headaches (and glue).
Here's how it works on a typical install with an example where I'm going flush to tile, which happens a lot:
I'll find the area where I'm going to start with a full board. From there, I take my laser layout tool and measure out the width of a few boards, usually two or three rows depending on the width of the material. If it's 7-inch-wide boards, then I'm probably only going to do two rows, but if it's 5 inches or less, I'll probably do three or four rows in the first section. Once I've got my measurements and have lined up my laser, I'll snap the chalk lines and dry-fit two to four rows at a time. Then I remove my boards (since it's only a few rows, I don't need to label them), spread my adhesive and work away from the flooring as I go.
2) 'Glue-out and go' for smaller areas
While the above technique works great for tackling larger areas 2 feet at a time, if I'm in an area that my crew and I can do in under an hour—say under 100 square feet with only square cuts and straight rips—then we can spread the glue throughout the rest of the room and give it one shot. Personally, I've found this technique to be a great motivator. Say it's 2 o'clock in the afternoon and you'd been planning to get that area installed before you go home. Well, it will definitely incentivize you to complete it once you put that glue down!
RELATED: Sticky Questions: Q&As on Essential Adhesive Know-How
It's critical to use more tape when gluing out an area like this, because you're working on top of the installed floor (whereas, when you're snapping sections, you're working away from it). The extra tape keeps the boards tighter and prevents them from moving around as you work.
Some other helpful tips
Snapping lines and "glue-out and go" are the two main glue-down installation methods we use on the job site. Here are a few other lessons I've picked up that help my business:
Grind your subfloors to create a strong bond: This one is self-explanatory, but I always use an edger and 16-grit to sand everything down on a slab or even plywood. If there's paint on the floor or any drywall mud, we just grind it off, usually with one pass.
Tape wedges to the wall: Oftentimes you'll find the walls are not straight. After we've snapped our lines and we've scribed our pieces to fit the wall, we cut wedges and tape them to the wall so they don't slip as we're installing. They give something to push the board against; you're not going too tight to the wall and are still leaving yourself some expansion room. You can cut these wedges out of the material scraps that are on site. I have a milk jug full of them. I don't like to use solid wood for these because it splits once you put some pressure on it; cross-ply engineered is sturdier when you're trying to pull the wedges out after the install.
Dry-fit critical areas: I dry-fit flooring most of the time. It's good to do before finalizing anything, whether it's nailed or glued. You have to make sure you're flush with the spots you need to be flush with and that everything is lined up properly.
Use quick support rods (QSRs) for areas flush to tiles/doorways: I've had jobs where I've put three or four buckets of adhesive on top of a seam but it still came up. QSRs are really a great help. They're just extendable rods that go from around 5 feet to 9 feet high and keep the tension on top of the boards. They're pretty much immovable. I mainly use them in doorways, because they do have the potential to damage the ceiling (you can put cardboard as a padding). They're about $45 apiece. For a while I got by with three, because usually I would just do one doorway at a time. But then a multi-unit project came along, and now I have 20!
Since starting my business in 2013, I've found that people notice when you're efficient and tidy with your adhesive. Sure, the other guy might cost a few dollars less, but then you have the hassle of trying to get urethane glue off of a prefinished floor. Having a clean, effective glue-down system can make all the difference.
 Quick support rods are a great way to keep tension on top of boards.
 Taping wedges between the flooring and the wall gives me something to push up against as I'm installing.
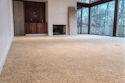
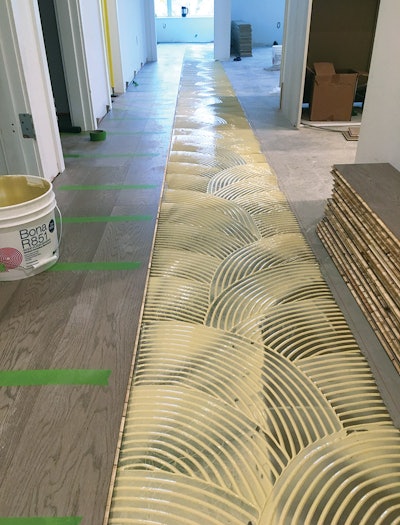
 The 'glue-out and go' method helps me tackle smaller areas quicker.