
Developers of luxury high-rise condominiums in many areas are enticing would-be residents by providing extensive recreational and fitness facilities. Care to bid on the hardwood floor for, say, a full-size gymnasium in one of these concrete and-steel behemoths?
You might want to think twice.
Not only are the typical between-floor concrete slabs in these structures notoriously imperfect, but such a wood floor would have to meet a condition that's often mentioned but rarely met.
"You have to have a level floor for a gym floor," says Don Conner, vice president of technical services for Harris-Tarkett in Johnson City, Tenn. Otherwise, he says, "I don't use the word 'leveling.' The right word is 'flattening."
Leonard Hall of Endurance Floor Company in Miami says, "Here in south Florida, we primarily run into concrete-slab construction in both single family work and in multi-family dwellings —condominiums, apartment buildings, that kind of thing. In some cases, we've seen building structures where they'll have a slab three degrees out of pitch." In a condominium, if you had to make it "bubble level," you could start at the high spot and by the time you worked your way throughout the unit, the top of the floor might end up four inches above the sliding glass door thresholds, he says.
Just flattening such a subfloor can be challenging enough.
"We've got one right now," says Hall. "The building is a relatively new, 54-story condominium building with world-renowned, international clientele." In the unit, "there's a 1 1/2-inch dip over 20 feet — it's just a big soup bowl," says Hall. "We're already into 75 40-pound units of patch in there: mix and pour, mix and pour, mix and pour."
Deviations
The National Wood Flooring Association guidelines call for bringing that subfloor to within 3/16 inch of dead flat over any 10-foot span, or, alternatively, within 1/8 inch over six feet, says Daniel Boone, NWFA director of technical training. These specs apply to wood or concrete subfloors, Boone says.
Unfortunately, "many times on new construction or even remodeling, some guys will just walk in and sweep a floor out. They won't check a wood subfloor for any damaged or loose places, or for any dips or humps in the surface," Boone says. "On concrete, they might just buff the slab down and clean it up."
The next thing they know, Boone says, they're installing the hardwood floor, the surface of which is going to reflect the time and effort — or lack thereof— devoted to prepping what's underneath. Virtually every subfloor Hall encounters needs some flattening— "All of them, and that's no joke," he says.
The first step in prepping any kind of subfloor is getting a good picture of what you have to work with. "A lot of people use an 8- or 10-foot straightedge," says Mickey Moore, technical director for the National Oak Flooring Manufacturers Association in Memphis, Tenn. "They'll lay it on the floor and just run it from one side of the room to the other and maybe across the diagonal to see how much deviation there is."
Hall buys 24-foot-long lengths of 1/8-inch thick-walled, 1-by-2-inch stock aluminum from an ordinary metal supply house. "We cut them in half to get two 12-foot straightedges," he says. "They're very straight, rigid and inexpensive. Since they're aluminum, they can be cut with any chop saw. On the job site we'll have, say, an 11-foot, 6-inch room. The 12-foot straightedge won't fit, so we just cut it off. So the straightedges turn into 11's, then 10's and nines and sixes for the hallways."
Finally it's just a matter of topping off the resultant straightedge sets with new 12-footers from time to time, Hall says.
They're not heavy to cart around, he says, but they're still "stiff enough to check the slab and to screed the patching product."
Other aids in determining subfloor flatness range from a simple string line to instruments of great precision. Sometimes, especially on commercial installations, people will shoot floor elevations with a builder's level, Moore says.
How about the laser tools that have become popular with suspended ceiling hangers and cabinet installers? "My gut feeling is that they would be good" for the job, Moore says, but "I don't yet see anybody using them much."
Laser tools are "just now" being tested in the wood-floor industry, according to Conner. "There are some new ones now you can set on the floor and adjust that are getting to be much more affordable."
Boone thinks price is the reason the laser tools have been slow to gain widespread acceptance. "I would say that one day probably everybody is going to have one," says Boone, "if they're affordable."
Going flat
Once the "topography" of the subfloor has been determined, how best to make it flat? The answer depends on whether the subfloor is concrete, or plywood or OSB over wood joists.
On concrete, "you grind the high spots and you fill the low spots," says Moore. "Open grit paper — 20, 16, maybe 12 grit, some rocks, basically"— is typically used on the buffer for grinding, he says.
At Endurance, "we have a series of floor buffers with hard plates that are for concrete only — older machines that are just going to get abused by the concrete dust," Hall says.
Other special equipment is available for the job, according to Boone. "They've got grinding plates with titanium, carbide, real hard steel that looks like you just spattered weld all over the plate," he says. "There are alot of different tools out there that they didn't have 10, 20 years ago."
Some companies will even have a designated drum or belt sander for grinding, according to Moore. "But the only thing it'll ever be used for is concrete. You're not going to do it with your regular machine," Moore says. Another approach to flattening a high spot is to "get your rotary hammer out and start chipping away at it," he says.
Low spots can be filled with an array of what the manufacturers variously refer to as "toppings," "underlayments," "patches," "levelers," "compounds," and "mixes." The application of special primers may or may not need to precede the use of these materials, which may or may not need to be augmented with aggregate or latex additives or with mesh, depending on the application and the existing conditions.
The products differ, not just between manufacturers, but between any one manufacturer's different products in order to accommodate the job requirements and the floor man. Consider the following factors:
Subfloor type: While most of these compounds are cementitious in nature, many are suitable for use over surfaces other than basic concrete, including ceramic tile, terrazzo, vinyl, cutback adhesive residue, metal, solid wood, and some plywoods and wood composition materials.
Size: Some products are intended to cover very large expanses that need filling, while others are suitable solely for patching relatively small areas.
Depth: The maximum thickness per application ranges from just 1/4 inch to 2 inches, depending on the product. Greater thicknesses can sometimes be achieved by using additives or reinforcing; some materials can be built up in multiple layers, others not.
Application: Most products are of the mix-and-pour variety, but some use a pump.
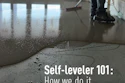
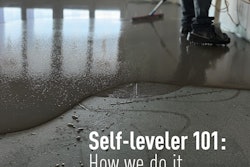
Similarly, some are "trowelable" while others are "self-leveling." Conner labels the latter as "a contradiction in terms. If it were self-leveling you'd just pour it on the floor, but you've got to push it around" in order to spread it, he says.
Hall enlists those cut-to-size aluminum straightedges for this purpose, and to "act as a screed as well, so there's very little hand troweling. What we do is pour the patching product — as much as three or four units of it — in front of the aluminum bar where there's a low spot, and two guys get on each end and pull it across and plow the material into the depression. Then all you have to do is just hand-feather the edges with a flat trowel," he says.
Curing: Dry times range from as little as 15 minutes up to several days. Some manufacturers recommend checking the moisture content to make sure it falls within the flooring manufacturer's recommendations.
Use: Some materials are designed to underlay floors that will receive only light-duty residential traffic, while others can handle variously greater degrees of abuse.
Heat: Some products are compatible with radiant heat, some only if the slab won't exceed a certain temperature, some not at all.
Manufacturers have different requirements for working air and slab temperatures and for substrate preparation (most suggest mechanically cleaning and roughening by sanding, sandblasting, shotblasting or grinding).
Tolerance
NWFA guidelines notwithstanding, just how fussy should the floor man be in the slab-flattening process? "The tolerances vary depending on how you're installing the floor," says Hall. "If you're gluing the floor down, you've got to taper that product down feather thin."
Slab preparation "is most important for a glue-down condition," agrees Conner, "because the finish floor will exactly reflect the flatness of the subfloor itself — it follows the contours. If there are any depressions or humps, they'll show up."
The glues in use today make this inevitable, says Boone. The products have, in effect, a memory; they tend to return the floor to the position it was in when first pressed into place. "As it dries and all the solvents evaporate out of it, the adhesive pulls the product down" tight to the subfloor, Boone says. "This is where a lot of guys get into trouble," he says: Although the installation might look okay at first, it looks progressively worse as it's sucked down into the depressions in the slab.
In contrast, "a solid, nail-down floor is more forgiving," says Hall, who most often deals with concrete subfloors and 3/4-inch, nail-down, job-finished strip. In these situations, he uses a two-layer plywood deck system. But, he emphasizes, "the only way to get it real flat is to start with the concrete first. If you've got a flat surface to work on, the plywood's going to lay flat." Properly prepping the slab "is going to make the installation cleaner, faster, and of course the customers are going to be happy when they put a piece of furniture on it and all four legs actually touch," he says.
Once the patching "is done and dried, we just go in there with the floor polisher with 20 or 30 grit paper and scour the edges down where the screeding left a little ridge, and then we just start decking right on top of it," he says.
Shims
There are other, lower-tech alternatives to the various leveling compounds. "If you're going to float a plywood subfloor over a concrete slab, and you just want your sub-base to be flat, you could do something as simple as putting dry sand down," or using pieces of sheet vinyl as shims, says Moore.
The same approach will work for engineered floating floor systems. "What you're after in a floating floor," says Conner, "is where the subfloor goes down into a depression, you want to put something down so when you step on the finish floor, you don't sink into it." In other words, preclude the trampoline effect.
Flat shims are used extensively in the flattening of wood subfloors as well. "If you've got areas that are low in frame construction — in an old house, for instance — you could shim up with different thicknesses of plywood: 1/4-inch, 3/8-inch, whatever it takes," Moore says. "Most of the time when you're running nail-down flooring, if you pick the pieces carefully, it'll be able to span the edge joints of that plywood. It may be just a 1/4-inch over 6 or 8 inches, for instance."
Moore cautions: "I would not use luan for the shims. Luan is not very dense; it doesn't hold fasteners very well. I would use douglas fir or southern yellow pine plywood."
Of course, any such shimming would take place only after the wood subfloor itself has been reworked, where possible, to whatever extent necessary.
On new construction, the first step, according to Moore, is to "call the builder and tell him to flatten the floor."
Given an older structure or an uncooperative builder, then what?
Start by using a circular saw to resaw any tight joints where the plywood or OSB panels meet, says Boone. Ideally, that saw kerf will relieve the joint enough so that the panels can be renailed or rescrewed down tight to the joists. "Then sand those seams — and any others that need it — down with a floor edger," he says. "It's critical." Also, be sure to set any protruding nails, staples or screws, Boone says.
Irregularities in the subfloor surface caused by high or low joists can be more problematic. Sometimes the joists can be reached from above by peeling back the actual subfloor panels. The high joists can then be planed or sawn to the right elevation; the low ones can be built up with flat shims.
Often, however, those subfloor panels can't be pried up. They may have been glued to the joists or, in a platform framed structure, they may have walls sitting on top of them. If the joists are accessible from below — say, from the basement — then shims can sometimes be inserted between the low joists and the subfloor above. "If you put in shims, it's normally recommended that you use flat rather than tapered shims," says Moore. "Over time, tapered shims will back out. If it's a high joist, a lot of people will cut them, let them sag, and then scab over the cut."
The trick is knowing where to draw the line. "If it's a major repair," says Boone, "it's got to go to a general contractor."
There are other, more involved, approaches to flattening floors — say, pumping a new slab over the top of the old one, or laying down and leveling a new sleeper system and fastening a new plywood subfloor to it. But these are typically used in extreme cases. And the elevation changes involved can lead to problems most floor men would only wish on a general contractor.
"You have all kinds of different scenarios to be addressed like door heights, cabinet and countertop heights, steps, room transitions," says Conner. "You get it all done and the refrigerator won't go back in because the overhead cabinet is in the way. Or the dishwasher's now permanently in place. If that happens, the dishwasher always breaks within three weeks. It's a law," he says.
In construction, the leg bone's connected to the thigh bone.
Performing all the necessary surgery on the subfloor, while taking all the proper precautions, is the first step towards ensuring a long and healthy life for the wood floor on top.