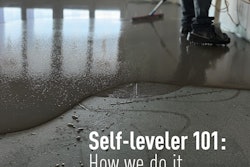
Bond-Breaker
I need to glue down an engineered wood floor onto a slab, but it has old adhesive on it from the carpeting that used to be there. How do I get rid of the adhesive?
Rusty Swindoll, assistant director of technical training for the NWFA, answers:
You're right to be concerned about removing the old adhesive. Old adhesive, paint or any number of other things are what we call "bond-breakers." That means they will cause a problem with the adhesion of your flooring and result in a loose floor. Before you start trying to remove the old adhesive, though, make sure there isn't anything on the slab containing asbestos or lead.
The best way to remove old adhesive from slabs is to use a machine called a floor stripper. It has a blade like a giant razor blade that oscillates. It plugs into a 110-volt outlet, and you can find it at most places that rent flooring equipment. For really big jobs, I've even seen floor strippers that you can ride.
On my jobs, we always removed all the adhesive with the stripper and then went back over the slab with 16-grit on the buffer. Just be sure you have all the adhesive off before hitting the slab with the buffer. If you are buffing over something like cold-stick adhesive, it heats up while you're buffing it, and when you stop, it cools off and sticks. When you start the buffer again, it'll be stuck to the floor and can throw you right against the wall (I learned that the hard way as a kid).
If you don't have a floor stripper, you can hand-scrape the adhesive off, but it will take a lot longer, and at the end of the day, your body will know you've done it. You'll want to use one of the heavy scrapers with big handles, a sharp blade and a place to put your foot, helping you use your body weight to scrape the adhesive off. I've also seen people use these to strip off old parquet floors.
Another option to get old adhesive off is beadblasting. Beadblasters shoot glass beads onto the floor to abrade it (removing the adhesive); contractors usually hire someone to do this as opposed to renting the equipment themselves. People sometimes consider using different solvents to try to chemically soften or remove the adhesive, but I wouldn't recommend that, because you could contaminate the slab, the fumes could be toxic and you could even potentially blow up the house.
Displeased with Dish-Out
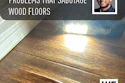
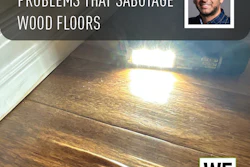
Why do some floors, especially oak, not look as flat as others?
Chuck Garvey, product specialist at Chicago-based Timbermate USA, answers:
The problem is not in the wood, but in the sanding procedure and some critical steps being overlooked. As far as the sanding process, one major thing that prevents a flat floor is grain dish-out. The reason for this is the softer wood of the grain is more easily sanded than the harder wood surrounding it. I have found the best, and easiest, solution to this problem is a three-disc sander. If you don't have one, you can also hard-plate with a buffer using a sandpaper disc rather than a screen backed with a soft pad. A screen with a soft driver pad causes the softer grain to continue to sand lower and lower, causing dish-out.
One other process that aids in making a floor appear flat is grain-filling. This helps by filling the soft and open grain, making it appear solid and full, so to speak. I grain-fill floors by going through all of the routine sanding progressions except for the final screening or hardplating. Typically, I make the final pass with the three-disc sander. Then, I thin the filler with water to about the consistency of latex paint (not all fillers recommend thinning with water, so check with the manufacturer of the product you use). Next, I trowel-fill the entire floor; I find that a grout float works well for this.
Allow the filler to dry, which usually doesn't take long because the product is spread very thin, leaving very little on the surface of the wood. Remember, you primarily just want the filler down in the grain, not on the surface of the wood. Then I make a last pass with the buffer or three-disc sander with a 120-grit or finer paper or screen.
When finished, you will still see the wood filler down in the grain of the wood, but don't be alarmed. As soon as the floor is stained or sealed, the filler blends with the wood and is no longer visible. As always, carefully research the products you plan to use and talk with the products' manufacturers to get their recommendations for their specific products.
Working with Water
I am able to apply oil-based finish with no trouble, but when I use waterborne, I have trouble. Why?
Bill Price, owner of The Villages, Fla.-based consulting and training company Floormasters.com, answers:
I find that many flooring contractors are set in their ways; they apply finish one way and when it doesn't work, they blame the finish. It's important that contractors understand the different finish techniques and application procedures.
First, read the directions. Floor finishes today are more applicator-specific than they have ever been. Your roller, brush, T-bar or lambswool applicator may work for one type of finish and not another. They may even work for one brand and not another brand that's the same type of finish. Talk to the manufacturer; they can tell you exactly which applicator works best for which product.
Viscosity and solids can and will affect application. An important part of using the right applicator is getting the recommended coverage rate. The biggest problem I see with contractors switching to waterborne finish is that they put the finish down too heavy or they get an uneven film thickness, or both. For example, lots of finishers will try to use a paint pad on a stick and snowplow the finish like you would with a T-bar, and they can't keep the pad flat on the floor, so they don't get uniform film. Or, they might try using the lambswool applicator they're used to and get frustrated when they can't get the finish to feather evenly. Or, they might use a recommended T-bar, but they walk too fast or too slowly to get the right coverage rate. When lowsheen finish is applied thicker than the recommended spread rate, it can be glossy, while the thinner areas will be the sheen on the label. That's because in areas that are too thick, the flattening agents settle to the bottom of the finish. Thick finish will also have problems drying sufficiently for abrasion.
Compared with oil-based finish, waterborne finish is a lighter-colored material with fewer solids and goes down in thinner coats, so you have to be more careful with turn marks and stop marks. And, try not to overwork the finish, which can cause foam or bubbles.
People on my website are always asking what tools and procedures to use for different finishes, and they get lots of different answers. What it comes down to is, if something sounds good to you, practice, practice, practice. If you feel comfortable with it and the final finish looks good, then do it on a customer's floor, but not before then.
Trick of the Trade: Under Pressure
By Galen Fitzel

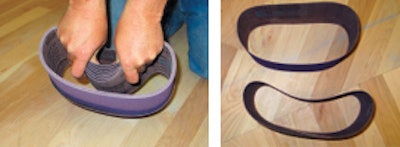
Abrasive manufacturers pack their sanding belts nested; the inside belts are compressed by the outside belts and end up taking on the shape of a kidney. Most contractors grab belts from the inside of the nest first, but it's a better idea to always take the belt from the outside by removing the inside belts as shown here. That relieves some of the pressure on the inside belts, allowing them to take on more of an oval shape instead of a kidney. That helps them run truer in less time when in use.