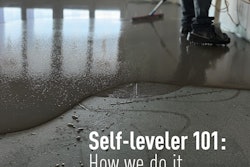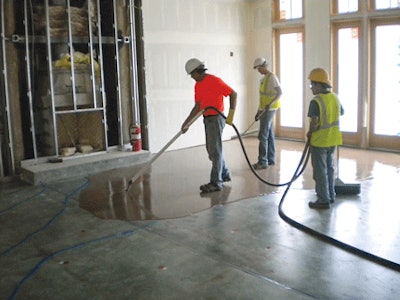
 These contractors are using a grout pump to spread the self-leveler.
Self-levelers can be a huge help on a job—done right, they help prevent squeaks, save on glue and just make the installation easier. But what can go wrong with self-levelers? Quite a bit, if you don’t follow the manufacturers’ instructions. That being said, the directions are pretty much the same from one manufacturer to another, so if you keep these tips in mind, you’ve got a good start to doing it right.
1) Use the recommended primer for the substrate and conditions on the job. Some levelers do not require that you shot blast the slab (that is, adding a texture to the surface), but others do. The important thing you need to know about primers is they penetrate and block the pores of the substrate. This is important because it keeps the measured water in the leveler mix, allowing the leveler to flow—that’s where the name “self-leveler” came from.
 An unidentified powder has contaminated the primer that was applied to this slab.
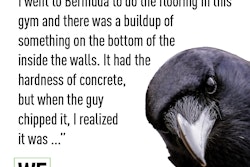
2) Don’t let anything contaminate the primer. Many guys like to prime the slab on a Thursday night, for example, and then come back at some point Friday morning to pour the self-leveler. In that time it’s possible three other trades have been on your floor—you’ve got the electrician getting wax on the floor, the sprinkler guy is spraying black nasty water and another guy who stepped in something oily leaving footprints where the self-leveler won’t bond. I’ve had floors contaminated by everything from a dead bird to mating racoons. So, I always liked to have one worker get there early to prime the slab, then have the other guys arrive to spread the self-leveler. That way you protect the area from intrusions by other trades, creatures or homeowners.
3) Measure your water. Don’t mess around with your water—if the directions say to add 5 quarts, add exactly 5 quarts. The scientific process happening with self-leveler is all based on the water. I recently taught a school with 65 installers, and one guy admitted to me he rarely does anything exactly by the book—except he always measures his water when he does self-levelers, because he knows he has to.
RELATED: Step by Step: How to Get a Concrete Slab Ready for Wood Floors
4) Let them dry like a cake. The leveler mix starts off very fluid, and then a lot happens really fast. An easy way to think about this is like a cake: If the top of the cake bakes or dries faster than the middle or bottom, it shrinks and ends up cracking. The same thing happens with levelers as they are curing, so you need to protect the leveler from direct air movement from fans, air conditioner vents, air from under doors, direct sunlight in front of windows, etc. You are trying to allow the leveler to dry at the same rate from both the top and bottom.
5) Honor saw cuts and expansion joints. I see it all the time. If the thing that I am stuck to moves, I’m going to move with it. Self-leveler does the same thing. Mark where the saw cuts are by marking the wall on both sides. The next day, come back and cut them with a saw—this is simple yet often missed.
6) Remember perimeter expansion. Remember how I said a lot is happening really fast? The water you put in the leveler mix causes a reaction with the cement particles and causes them to grow spikes (remember, this is the short version; it’s complicated). Those spikes push against each other, and then the leveler mix starts to lose water. This leaves voids, and those voids allow the cement’s spikes to pull back. (Once again, this is a short version.) So the leveler expands and then contracts. Keep this in mind, because if you do not allow for perimeter expansion, the ends can curl up.
7) Read the directions for that product. Each one has a different maximum depth; the ones I work with go from ½ inch to 2 inches. Exceeding that can result in problems with shrinkage. The products also have different requirements for correct curing conditions for temperature and relative humidity.
8) Walk the floor after it dries. Before installation, walk the floor. Are there cracks? Microcracks on top might be OK for wood flooring as long as they don’t go down the full depth, but bigger cracks must be repaired. I also “sound” the floor—tap it to look for hollow spots. Those debonded areas can result from uneven drying, poor surface prep or those contaminants we discussed.
I don't want to scare you. With a little practice, and keeping these tips in mind, using a self-leveler is an effective way to flatten and level your substrate. Remember, the flatter the floor, the easier the install.