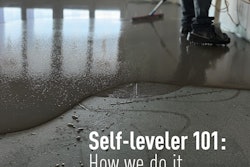
 On this job, we used plywood blocks precut to different depths at our shop to fill in the low spots in these subfloors prior to installing a double layer of plywood as the final subfloor.
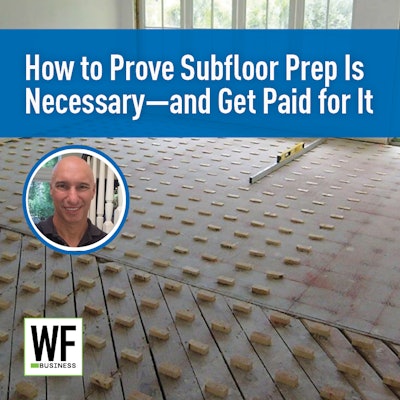
Floor prep, for leveling or flatness, is so important to a wood floor’s success. Yet, more often than not, I run across floors that have had little to no floor prep, or incorrect floor prep with respect to correcting undulations or using the correct materials. Poor, improper or lack of floor prep is an industry-wide issue at the retailer/installer/contractor level, as evidenced by the number of products developed and sold to remedy complaints ranging from hollow areas to moving floors installed over uneven, out-of-flat and/or out-of-level subfloors.
Yet floor prep can be a lucrative proposition for flooring contractors and installers. The difficulty may lie in the ability to convince the customer to invest in their own happiness. So the question really becomes, “How can I convince the client this is what I need to do to make the floor a success for years to come?”
Why does prep matter?
Before I get into the floor prep sales technique I employ, let’s discuss: Why is proper floor prep so important? There are several valid points to bring up with clients about the need for proper floor prep.
 An uneven subfloor can cause adhesive to not contact the boards sufficiently.
1) Following guidelines. NWFA's Installation Guidelines, as well as many, if not all, manufacturers have minimum tolerances for flooring to be installed over a wood or slab subfloor (members can access the Guidelines at nwfa.org). Not following these minimum guidelines can lead to client complaints, defective installations and, possibly, costly removal and replacement of the floor. Any floor complaint is a potential reputation killer, so why take the risk?
 Baseboards not flush to the floor are an obvious indication of bad subfloor prep.
2) Getting adhesive transfer. Floor prep done properly contributes to getting the needed adhesive transfer to the product during installs. There is no way to conform a single plank, let alone an area of assembled tongue-and-groove material, to slab irregularities, as it is so stiff it will not comply to an undulating subfloor. Adhesive transfer is reduced or severely compromised (see the photo at top right), which leads to hollow sounds, potential movement and squeaks in the floor. This happens often—just look at the number of complaints nationwide and the sales volume on those “repair kits!” Manufacturers, distributors and retailers alike would benefit from reduced claims dollars and the energy wasted in dealing with these claims if the retailer/contractor insisted that proper floor prep be part of the floor sale.
RELATED: Familiarize Yourself with Wood Floor Adhesive Basics
3) Improving the visual appearance. Visually, lack of proper slab prep will be seen as “prisming” in reflected light and/or as visual undulations in the floor. Then there is the trouble with baseboard and cabinetry installations where base materials and cabinets applied to the floor result in large unsightly gaps between base/cabinets and the wood floor (as in the photo on this page). What’s the common (wrong) solution to not doing the needed proper subfloor prep? Adding shoe mold trim to conform to the irregular floor install.
4) Preventing problems with refinishing. Long term, not executing proper floor prep interferes with potential refinishing, particularly for those engineered floors that manufacturers claim have the capability for “three sandings.” Sanding equipment (in the hands of a true professional) wants to cut “glass” flat. With factory finished floors, at some spots, there are low corners adjacent to high board edges. The sander cannot help but eat into the top of any ridges or other high spots, compromising or eliminating the wear layer.
RELATED: A Guide to Subfloors Used Under Wood Flooring
Floor prep is not a mystery, nor is it a taboo subject that should be avoided with clients, but I, too, had this problem in my early years—until I eventually developed a method for selling it. My system works well, is repeatable and can’t be denied, because it is based on facts and data. It leads to more contracts awarded with floor prep change orders—all without clients doubting what is or isn’t really needed. This is my “How To” on proving floor prep is needed and why it costs what it does.
Flat or Level?The difference in "level" versus "flat" is whether the whole of the space is on the same plane or not. Level is just a special case of flatness, but flatness does not imply level. A floor could be, by definition, flat to a specific tolerance and not be level throughout (or at all—e.g., it might be flat but slope down to an outside wall, or have an incline rolling over to a decline on a span longer than the tolerance specifications, etc). This method can still be used to determine what flatness tolerance the owner can live with, and in extreme cases where some building parameters just won't allow level, I have done flat but not level work, as well. I believe the key is having the data on the subfloor identifying what level is. With that information, you can then determine how to make the subfloor "out of level" yet flat enough to be within acceptable tolerances and still have a client who is happy with the end result. |
Steps for figuring out floor prep

Step 1: You will need a laser, a tripod and at least a tape measure or long board for the laser measurements. I developed my measuring device as a story stick by putting two rulers end-to-end on it at the level I typically set my laser to for measuring elevations (60”). You can easily place ruler tape or even mark it by hand, if need be. The goal is to have something the laser line will be read from, and that you can easily move around the room and measure the floor elevations with (photos 1 and 2).

Step 2: Whether we are doing a whole house or just one room, I use the laser and the story stick to find the highest point or the point I need to be flush to. It could be the exterior door sills or a wood floor we are going to integrate with. In this job, we have marble in the main areas, and the bedrooms will be wood. The owner wants the floor to be flush with both the marble at the doorway and the bathroom. Here, we label the marble with a “” symbol to designate what we start with as the highest point off the slab (the “^” indicates marble). The laser is now set up at 60” above our “zero,” or finished floor elevation (photo 3).

Step 3: I know I have sound reduction material, two layers of plywood and ¾” flooring going here for a total floor system thickness of 2” (photo 4). That means the laser marks can be readjusted to the bottom of my floor system for the needed level slab elevation of -2” relative to the marble. Photo 5 shows the marble is 2” above the new “zero,” which is the slab elevation needed. At this point we continue all future measures and wall marks with the new “zero.”
On job sites with no external references to meet with, the highest scanned point in the subfloor becomes your “zero” and all elevations read after should end up negative (lower than the highest point).

Step 4: Align the laser elevation to match the story stick on its “zero,” because that is the location of the highest point in the slab or the finished floor elevation. I also make indication marks on several walls; these become my control marks. Each is labeled with the date, company name and initials of who marked the wall. That way, we can refer to them later on and know with confidence which mark was ours. We try to put them in locations that will survive the construction term (studs, concrete block and drywall get covered or painted, but most door jambs and windows/window frames remain throughout most of the project)(photos 6 and 7).


Step 5: Now as I move the story stick in a grid pattern of about 3’ x 3’, the laser will indicate how low the subfloor is relative to that high mark of “zero” and the floor is marked with the negative elevation readings (photos 8 and 9). If I cannot read the laser because something blocks the line of sight or it’s too bright, I can transfer additional marks based on the original control marks. The laser is moved and indexed to the original control elevation of “zero” and additional marks are placed as needed to aid in additional laser movements. In photos 10 and 11, Carlton is marking the transfer with his initials.

Step 6: Once the subfloor is fully marked up, I can now use the numbers to show the client in person where their subfloor is out of level. I can even show the client that it is impossible to have a level floor at both stone doorways since the bathroom is a full ½” below the main area marble (photos 12 and 13).
The conversation now changes from, “Is floor prep really needed?” to, “How much will it cost to fix?”
Determining that number depends on your business model, your internal costs in materials and labor, and the severity of work that may be required. It could be a straightforward floating of self-leveling compound or other Portland-cement-based patching materials. It might mean grinding down on a wood subfloor or on strategic points in a slab to alleviate the amount of prep work needed. All this can be determined with confidence because you have the data to support your plan of action.

Step 7: If the owners are not present, the marks can be transferred to a set of plans or even hand-sketched on site (photos 14 and 15). Then you can snap a picture and send it to the client for an immediate discussion and decision. I have gone as far as using colored pencils to shade in the elevation changes (in the drawing at left, you can see green indicates high areas and red indicates low areas), because for some clients, visuals really send the message home. They are always appreciative of the effort and rarely balk at the need to do the leveling work.

If you know your labor times for scouring the subfloor, mixing and pouring, you are well on your way to make a profit on subfloor leveling. This technique also works for plywood subfloors using “dry” materials to patch, from doorskin through various plywood thicknesses, as well. You just have to figure out what thicknesses are needed where, and what labor, adhesive and fasteners you will consume.
It’s not unusual for subfloor prep to come to over $5 per square foot. You may think clients wouldn’t spend the money and you are right, they don’t want to spend the additional money. But if you show them your data and discuss the logic of investing in their happiness for a successful wood floor for years to come, they will have a hard time arguing against what is right for a successful floor.

Now take a quiz on what you've read: