You walk in the house to start your glue-down hardwood floor install. The builder has assured you the place is “ready to go.” The parts of the subfloor you can see are covered in paint overspray and drywall mud. This is where you start rolling your eyes and think, “Here we go again.” Walking across the floor feels more like you are in a skateboard park than on a floor that is flat and ready for hardwood—plenty of high and low spots. The area of the subfloor that is bare looks awfully smooth. Water drops just sit on top of the concrete rather than soak in. You realize you have a lot of work to do before you can start your installation. You know that the subfloor needs to be “flat, clean and sound.”
How will you get this headache of a subfloor ready for your beautiful new hardwood? Here are a few tips that can help:
1. Get that floor clean
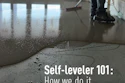
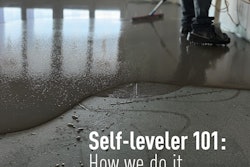
 Tools designed to help make your concrete slab subfloors flat and clean can be a time-saving investment.
That means you need to remove all the contaminants. Get rid of all the overspray, drywall mud and who knows what else off of the floor.
2. Assess the floor flatness
Mark the high and low spots. Now you are ready to grind down the highs and fill in the lows. Make sure you use an approved cementitious leveler applied according to manufacturer’s instructions. Don’t forget to prime before you pour!
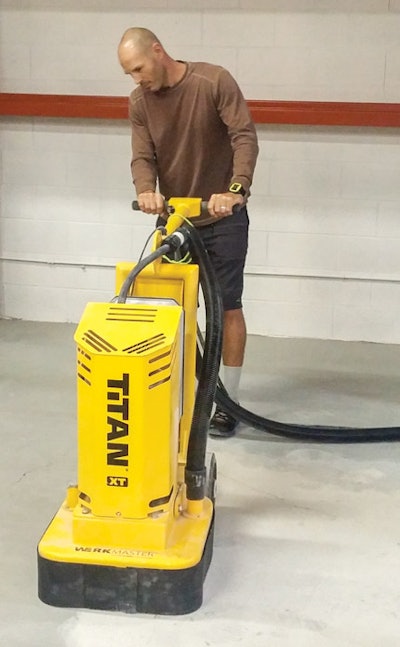
3. Consider using a grinder
Using a 16-grit diamond under a multi-disc grinder will allow you to remove contamination, reduce high spots and produce a proper surface profile that will give you a good surface where the adhesive can bond. This tooling will open up a power-trowelled floor and remove any concrete sealers from the surface. We like using a grinder that will get right to the wall, because it allows us to profile the field and edge with one walk-behind machine.
4. Use dust containment
When grinding, make sure you use proper dust containment. Silica dust is dangerous—you don’t want it in your lungs, and you don’t want to fill your job site with dust. That can be a difficult and expensive clean-up.
5. Consider the risk
You are probably thinking, “Great, now we need to be concrete finishing experts!” The reality of our trade is we are responsible for the floor we install. If we install over a subfloor that doesn’t meet industry requirements, we are held responsible when there is a failure. It is not worth gambling with this assumed risk.
6. Charge for your value-added service
Obviously, preparing a subfloor properly takes time, skill and proper equipment. None of those things are free. We need to charge for this specialized—and essential—service. This is a value-added service you can provide to your customers. When explaining this, it is helpful to remember we didn’t ruin their subfloor … however, we can fix it! Whether they hire you to fix it or decide to hire someone else, the bottom line is it needs to be prepared properly before they can have their hardwood floor installed. You can be the solution to their problem. When you provide that solution, you improve the quality of your workmanship, increase your professionalism and boost your profits.
This article was paid for by WerkMaster Grinders & Sanders Inc., where Graeme Rosen is sales manager. For more information, visit www.werkmaster.com.