


Hello all, Keith Long here with Thunderheart Flooring, based out of Greeley, Colorado. We’ve been going through the production work to fabricate the pinwheel parquet squares (read about how this job came about and how we started creating the parquet). Let’s get these parts put together:

We made three jigs out of plywood to glue the pieces together in. That way, three parquet squares could be glued up before heading to work first thing in the morning, and three more after the regular day’s work, for a total of six per day.

Here are the pieces needed to make one square. Robin cut underlayment paper to fit in the jig, which kept any excess glue from bonding to the plywood.

Let the gluing begin! We put Titebond (yellow glue) on the miter between the pieces of walnut, then on the two sides of the maple that touched the walnut. No fasteners, just glue. Watching me trying to keep track of where each piece went in this pattern and get it all glued and fit by myself would have been about like watching a three-legged cat trying to take a piss on a frozen pond. I’m thankful this production work was being done in a heated garage bay at our home so that my wife could help morning and evening for a few days…

Having a set of qualified set of hands to assist on a project such as this makes life less stressful. Note that our paper drawing was upright in front of us for reference. I would figure out which piece was the next one needed, and handed it to Robin, who glued the appropriate sides, and set them in place.

Once each of the three jigs had parquet squares glued into place, we weighted them down, and let them sit for about 12 hours while working on a separate job site for the day.

Upon returning home, we took the squares out of the jigs, removed the underlayment paper from the backs of them and stacked them upright. We did another three and weighted them to dry overnight. A few days of doing this and they were ready for transport and acclimation.

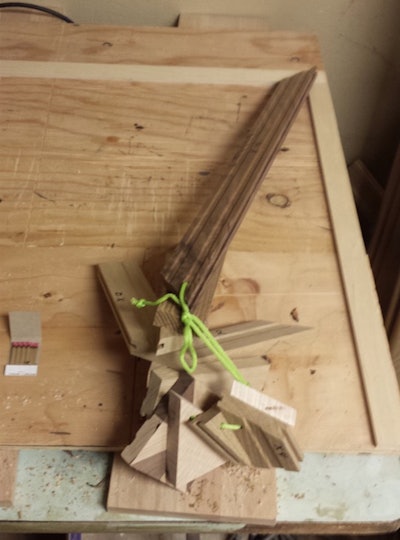
I invite you to look at the above picture and make an assessment of what can be seen. Some installation tools, wood, glue, etc.—pretty standard stuff for most flooring contractors to have in a shop or garage bay. I am suggesting that most of what is needed to complete custom parquet squares—of any kind—is already in the possession of the average wood flooring contractor.
I believe what helps make a floor man (or woman) above average is keeping their minds, then their hands and feet, moving forward in positive ways. I’m hoping that the processes in these blog posts, spelled out in detail, will spark a fire in any of you that want to be above-average at our craft. Getting those hands and feet moving to create custom work of your own is a big, and in my opinion, important component of this.
The first bordered floor I installed on my own over a decade ago had miters that were so atrocious that had I not put in slivers and wood filler, a small dog could have become lost in the voids. I was unsure about doing something like that, which at the time was outside of my comfort zone, but I did it anyway. The next border installation was more tight, and I felt more comfortable doing it. Now, border installations feel as natural as getting out of bed in the morning.

I live in Colorado, while the rental property I was on my way to close on and set this wood to acclimate at was in Moberly, Mo. (about 840 miles east), which was on the way to a custom flooring job I had scheduled to help another flooring contractor with in the Chicago area.
I was driving across Kansas through the night to make the real estate closing on time the next morning in Moberly, and I planned it so I could be passing through Kansas City just before the time Kimminau Wood Floors meets at their shop in the morning before heading out to their job sites for the day.

I had time, and I had the inclination. So, I stopped by Holt’s in Grandview, Mo., for a couple boxes of donuts, rolled up to the Kimminaus’ shop and said, “Top o’ the mornin’ to you, brethren!”
I had brought along one of the gluing jigs and enough extra pieces to glue up one square of the parquet with the boys in KC, and I gave them a copy of the master set of pieces needed to replicate it with the cord running through it. Johnnie Kimminau is pictured here gluing up a square, which he ended up incorporating into a landing in his home.
The Kimminaus have their minds, hands and feet moving for sure. Even if just for an hour or so in this case, it’s always nice to see them. Ben Kimminau, owner, has a business mind, and understands that putting time, effort and understanding in yields happier customers and a better bottom line in the long run.

The real estate closing was straightforward and took about 20 minutes from start to finish—buying with cash keeps the paperwork simple. I pulled the carpet, pad and tack strip, and prepped one room, then set the bundles of flooring to acclimate. I mocked out the parquet squares where they would end up being installed so they could acclimate for the next six weeks just one layer thick, not in a stack.
Let’s pick it up again next week when Chuck Burkhart of Burkhart Wood Floors out of North Carolina and I get into the installation of this room.
Until then, stay sharp!


