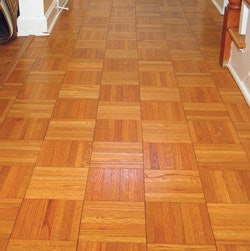
Some contractors are intimidated by sanding and finishing parquet flooring, but once you know the correct process, there's really nothing to it, and you can apply that technique to new or existing floors. Just be comfortable with the fact that, at some point, you will be going against the grain, which means you have to be that much more diligent making sure cross-grain scratches don't show in the end product. Some contractors use random orbital sanders, oscillating sanders or three-disc sanders for parqu

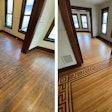
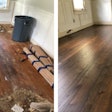
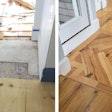
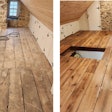
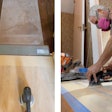
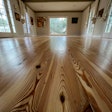
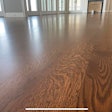
Some contractors are intimidated by sanding and finishing parquet flooring, but once you know the correct process, there's really nothing to it, and you can apply that technique to new or existing floors. Just be comfortable with the fact that, at some point, you will be going against the grain, which means you have to be that much more diligent making sure cross-grain scratches don't show in the end product. Some contractors use random orbital sanders, oscillating sanders or three-disc sanders for parquet, because direction doesn't matter with these machines. But even working with a big machine is still fairly easy. This particular floor poses some difficulties because it's in a small space, will have stain on it and is in a well-lit, high-traffic area. Another concern is we don't know how many times this thin, solid seven-finger parquet has been sanded. If we take off too much wood, we might expose tongues and grooves, so we need to make our cuts as efficient as possible. We start with the highest grit we can that will effectively take off the old coating, and go as fine as we can Every contractor should use his own judgement on what grit to use.
RELATED: The Basics of Sanding Wood Flooring
SUPPLY LIST
- Big machine
- Buffer
- Edger
- Abrasives
- Hand-scraper
- Maroon pad
- Hard-plate
- T-bar or other applicator
- Cut-in pad
- Finish
Step 1
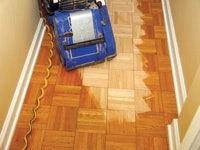
Our first pass is with a 40-grit belt on the big machine. We go diagonally to most of the grain to prevent as much cross-grain sanding as possible while still flattening the floor. If we attacked the floor straight like a strip floor, we would dish out the softer grain (spring wood), causing humps.
Step 2

Our second pass is with a 60-grit at 45 degrees moving on the opposite diagonal. We're diligent about not skipping grits, particularly when sanding at a 45 on parquet—which is a very aggressive cut —because otherwise we couldn't get out the scratches caused by previous grits.
Step 3

To make sure the floor is flat, for our third pass, we use an 80-grit abrasive along the longest part of the room. This direction is the main focal point for this hallway, and we want to minimize grain scratches. Because of the fine grit, we don't have to worry about dishout when going directly across the grain.
Step 4
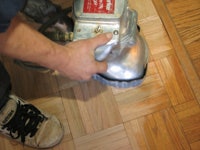
Next we edge, starting with a 40 grit and following the same grit sequence. We change the angle of the edger to go in the direction of the grain to take out the big machine's scratch. Another option would be to begin edging with a 60 grit after the second big machine pass (if the abrasive doesn't start gumming up with coating too fast).
Step 5
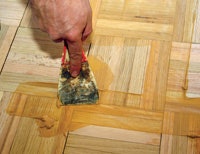
We then use an appropriate filler to fill the gaps of this old flooring, letting it thoroughly dry before buffing. This step may also be done prior to the final cut of the big machine. Or, you could trowel-fill the entire floor, as this will show any uneveness or spots that you should go back to after a final sanding.
Step 6

We hand-scrape the corners, going with the grain in each square of the parquet.
Step 7
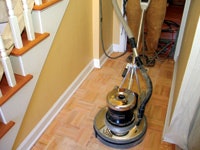
Our first buffing pass is with a 120-grit disc backed by a hard-plate. We use the same buffing pattern as we would on strip flooring. Our next buffer pass is with a 120-grit screen backed with a thin white driving pad and hard-plate. (Thicker cushioning under the screen could cause dishout, as could screening without a hardplate.) We avoid overscreening, which also causes dishout.
Step 8

We mixed a stain to match the homeowner's adjoining floors. It would be inefficient to apply stain square by square with the grain, so by wiping on and wiping off in circles, we hit most of the squares with the grain. While we're on our knees, we check for any sanding imperfections and undesirable scratches that we can take out with hand-sanding or scraping.
Step 9
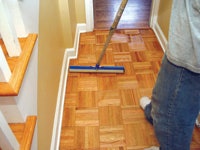
We use a cut-in pad and then a T-bar to coat the floor with an oil-based urethane. We apply in the longest direction of the room, which is the focal point. This coating will level itself out and won't show finish streaks against the grain. (It would be impractical to coat each square individually to go with the grain.)
Step 10

After letting the finish dry per the manufacturer's instructions, we screen with 120-grit and then handsand around the edges of the room and corners. For the hand-sanding, we go in the same direction of the grain of each square of parquet. We then hand-scrape out any finish imperfections.
Step 11
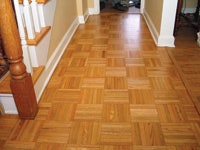
Finally, we buff with a maroon pad. You can also use an 80-grit screen instead for this step. After vacuuming and wet-tacking the floor, we coat the floor again.
et, because direction doesn't matter with these machines. But even working with a big machine is still fairly easy. This particular floor poses some difficulties because it's in a small space, will have stain on it and is in a well-lit, high-traffic area. Another concern is we don't know how many times this thin, solid seven-finger parquet has been sanded. If we take off too much wood, we might expose tongues and grooves, so we need to make our cuts as efficient as possible. We start with the highest grit we can that will effectively take off the old coating, and go as fine as we can Every contractor should use his own judgement on what grit to use.
RELATED: The Basics of Sanding Wood Flooring
SUPPLY LIST
- Big machine
- Buffer
- Edger
- Abrasives
- Hand-scraper
- Maroon pad
- Hard-plate
- T-bar or other applicator
- Cut-in pad
- Finish
Step 1

Our first pass is with a 40-grit belt on the big machine. We go diagonally to most of the grain to prevent as much cross-grain sanding as possible while still flattening the floor. If we attacked the floor straight like a strip floor, we would dish out the softer grain (spring wood), causing humps.
Step 2

Our second pass is with a 60-grit at 45 degrees moving on the opposite diagonal. We're diligent about not skipping grits, particularly when sanding at a 45 on parquet—which is a very aggressive cut —because otherwise we couldn't get out the scratches caused by previous grits.
Step 3

To make sure the floor is flat, for our third pass, we use an 80-grit abrasive along the longest part of the room. This direction is the main focal point for this hallway, and we want to minimize grain scratches. Because of the fine grit, we don't have to worry about dishout when going directly across the grain.
Step 4

Next we edge, starting with a 40 grit and following the same grit sequence. We change the angle of the edger to go in the direction of the grain to take out the big machine's scratch. Another option would be to begin edging with a 60 grit after the second big machine pass (if the abrasive doesn't start gumming up with coating too fast).
Step 5

We then use an appropriate filler to fill the gaps of this old flooring, letting it thoroughly dry before buffing. This step may also be done prior to the final cut of the big machine. Or, you could trowel-fill the entire floor, as this will show any uneveness or spots that you should go back to after a final sanding.
Step 6

We hand-scrape the corners, going with the grain in each square of the parquet.
Step 7

Our first buffing pass is with a 120-grit disc backed by a hard-plate. We use the same buffing pattern as we would on strip flooring. Our next buffer pass is with a 120-grit screen backed with a thin white driving pad and hard-plate. (Thicker cushioning under the screen could cause dishout, as could screening without a hardplate.) We avoid overscreening, which also causes dishout.
Step 8

We mixed a stain to match the homeowner's adjoining floors. It would be inefficient to apply stain square by square with the grain, so by wiping on and wiping off in circles, we hit most of the squares with the grain. While we're on our knees, we check for any sanding imperfections and undesirable scratches that we can take out with hand-sanding or scraping.
Step 9

We use a cut-in pad and then a T-bar to coat the floor with an oil-based urethane. We apply in the longest direction of the room, which is the focal point. This coating will level itself out and won't show finish streaks against the grain. (It would be impractical to coat each square individually to go with the grain.)
Step 10

After letting the finish dry per the manufacturer's instructions, we screen with 120-grit and then handsand around the edges of the room and corners. For the hand-sanding, we go in the same direction of the grain of each square of parquet. We then hand-scrape out any finish imperfections.
Step 11

Finally, we buff with a maroon pad. You can also use an 80-grit screen instead for this step. After vacuuming and wet-tacking the floor, we coat the floor again.


