Greetings and salutations, Keith Long here with Thunderheart Flooring to go through a 4-inch select white oak project recently completed in Kansas City, Mo., in conjunction with Kimminau Wood Floors.
This job was contracted through Schloegel, a highly regarded home remodeling firm in the Kansas City area. When our crew arrived on the job site, we put our heads together with Schloegel employees Donna, the designer, and Billy Andrews, the project coordinator for this job. We were handed a set of plans, reviewed the scope of work and confirmed the time frame it would take to prepare the subfloor, install, sand, stain and finish. We agreed to put down six stain color samples at the end of the second day.
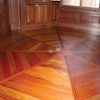
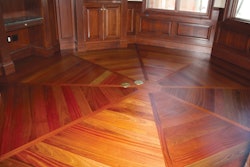
The above picture is the formal dining room, where the plans we received called for a herringbone pattern. Since the room would be wrapped in 2-by-2-foot squares of marble, there were specific parameters as to where the herringbone pattern would be set in the room. Donna wisely asked if where the pattern terminated on the long runs would be equidistant. We confirmed this, saying that we intended to start the pattern on the centerline of the room, running north and south. If we did so, both long-run sides would have the same length pieces where the herringbone pattern would terminate and the border would begin.

For her career, Kristyn Kimminau works in architectural design. She is a dynamic young woman working toward becoming a partner at the firm where she is employed. When asked that evening if she could create a couple options for the potential dimensions of the pattern in this formal dining room, she gladly said yes. “Like a duck in water…” I thought to myself as I sat beside her and she asked for the dimensions and made these two options.
One of the rules of getting a herringbone pattern to come out is that the length of the pieces must be a multiple of the width of the stock. Many of the herringbone patterns I have done in the past have been around six times the length if they are 2¼-inch boards, but closer to four or five times the length if they are 4-inch boards. Since this formal dining room was not a large area, we started with 4 inches wide times a multiple of four, and arrived at the option seen on the right, with 4-by-16-inch pieces.

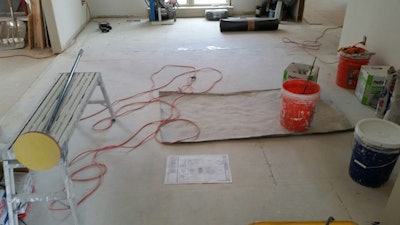
Billy runs a tight ship. He cleared the formal dining room so we could get started preparing the subfloor. He seemed to always be busy doing something constructive, yet at the same time available to answer any questions we had, and he was right on top of coordinating timely solutions as needs arose. Schloegel is wise to have such a handy and resourceful person in their employ.
Alright, fellow craftsmen—we’ve planned our work, now it’s time to work our plan! Let’s see this project to fruition over the next four Fridays as the flooring technicians at Kimminau Wood Floors and I go through what we did for subfloor preparation, the mapping out of how and where to lay the herringbone pattern, the installation of the boards, and the sand-and-finish in this room.
Stay sharp out there, brethren. Catch you all next week!