In part 3 we finished with setting the first tread, now it's time for a riser.

I measured and cut the S4S (Surfaced 4 Sides) poplar material to width. Since I ended up trimming out the side profile with red oak, I didn't miter the ends back on themselves. Notice on the above picture that I put a 5-degree bevel on my rip cut for height. I do this to get a better fit between this riser and the next piece of stair nosing that will go in on top of it. So, the outside profile of the riser that is seen is slightly higher than the inside profile where the adhesive goes.

This is how I run my adhesive on the risers. I start and stop a little short of the top and bottom of the riser, because as thick as the beads I run are, it does spread out when fastened in place. As mentioned previously, I prefer to lay a few generous, humped up beads of subfloor and construction adhesive as opposed to a thin layer everywhere. It's best to make sure the rise is level before fastening-shim if you have to. This flight was holding true, not all staircases I have worked on have been this plumb. Not the end of the world, but I always have at least one large pack of cabinet shims in my work vehicle at all times. I pull them out and use them if necessary.

I use a 15-gauge finish nailer, generally with 2-inch nails, to fasten risers and treads. I was taught that with wood, once a fastener goes through the material to be fastened, and is ¾ inch into the substrate (what the material is being fastened to), any extra length on the fastener gives no extra holding power. So, by rights, I could get by with 1 ½ inch fasteners in this instance. I use 2-inch finish nails to blind-nail start or end rows of flooring, so I stayed with those for this application. I put two nails, one in line with the other up and down, on the left side, then the same in the middle, then the same on the right. I refrain from going left, right, then middle, because that could potentially leave a hump in the middle. Going left, middle, right walks any bow out of the material. I thumbed in the nail holes with white wood putty.

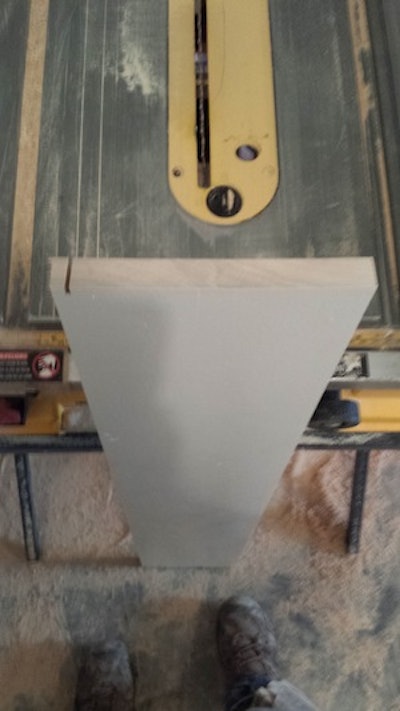
Next, I put a piece of stair nosing up on the second step, and marked the angle on both sides to be cut. Since the bullnose part overhangs the riser 1 ¼ inch, I measured back that far and 45-degree-angle cut back the overhang only. This leaves a profile that another piece of the bullnose can match up with to achieve a mitered return on the side profile, which is pleasing to the eye. Notice my pencil line is still there in the above picture. My theory on making fine cuts is, "Don't wake the baby". Although I have a laser function on my miter saw, I still test my cut outside the line I want to end up at. Once I've verified that my angle is dialed in, then I ease into the line for a perfect final cut. When starting in flooring, I tried out the "Kick down the door" theory of starting right on the line and going for it. I never have figured out a way to put the "Whoops, I cut too much cut off" part back on the board. The frustration and wasted material isn't worth it to me. These days I've slowed down, and found that taking my time gets me to the finish line the faster with minimal or no collateral damage.

Another trick I was taught is that when cutting stair nosing, a carpenters pencil is the same thickness as the hook on the bullnose. Putting a pencil underneath gets the material back to level for cutting. Thanks, Daniel!

One of the first floor guys I did any measurable amount of hardwood floor installation with is Mark Jenkins from Fort Collins, Colo. I was fortunate enough to get off to a great start with Mark-he cares about what he's doing and does great installation work. I can remember him instructing me that if I find myself wondering if I should or shouldn't glue something, to go ahead and glue it. Once this first stair nose part and the riser material behind it became dialed in the way I wanted them while dry fitting, I ran my beads of adhesive. Then, I put Titebond in the groove of the stair nose, then spline. I blind-nailed the stair nose in place through the spline, then followed up with more Titebond on the spline before backfilling the riser material.

These first two treads are time-consuming. They took me about the same amount of time to install as the rest of the treads and risers above them. From here on out, finding the angles to the drywall on either side is relatively straightforward. I cruised up the staircase going tread, then riser, tread, then riser to the top:

Let's meet up one more time next week to get this staircase buttoned up. Stay sharp!
[Editor's Note: See the other parts in this series on winder stairs: Part 1, Part 2, Part 3, and Part 5.]