Keith Long here with Thunderheart Flooring to wrap up this winder staircase project. (See the previous posts about this project: Part 1, Part 2, Part 3, and Part 4.)

I'm a stickler for detail, and like to have things just so. The way I see it, even if I end up spending quite a bit more time getting things fit to my satisfaction, it's worth it. My company's name and my reputation are on the line on each job. Whoever lives in the home is going to see my work on a regular basis for many years, maybe the rest of their lives.
Before I started in hardwood flooring, one of the things I did was own and operate a company that did pre-commercial thinning for both the U.S. Forest Service and Colorado State Forest Service. We had plenty of equipment to maintain, including an aerial lift that got the driver's-side window smashed in. I called a local auto glass repair company, and the owner came out to replace it. He was so meticulous, vacuuming up all the broken glass in the window well, in the rig, and on the ground, even though we were way out in the boondocks. When I told him that I appreciated his attention to detail, he said to me, "I follow two main rules with what I do: One, I show up on time. Two, I do every job as if I'm doing it for my own grandmother."
That's stuck with me throughout the years. When there's a gap while installing, and I know that I can do better if I grab another board and do it over, I sure wouldn't leave it that way at grandma's house, so it makes the decision easy.

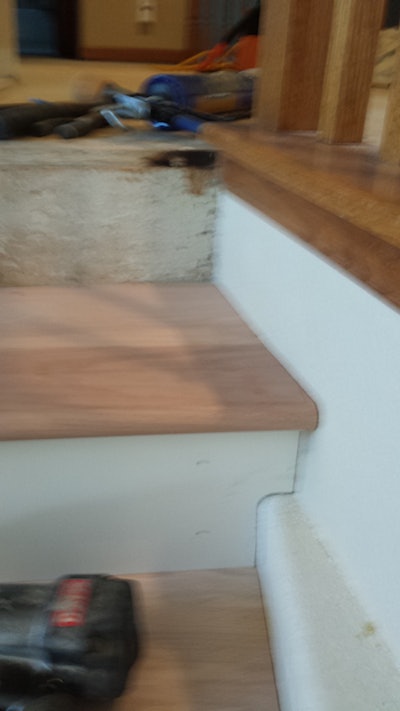
Okay, so back to that winder staircase. Now that the treads and risers are in, let's finish off the side profiles. I took two 8-foot-long pieces of 3½-inch stair nosing and ripped the bullnose only off. This marries up perfectly to the overhang on the stair nosing that's already in place, and it can be mitered on both sides to make a return that's pleasing to the eye. I fasten with Titebond and two 15-gauge 2-inch finish nails per return. It's best to be cognizant of the angle of the finish nailer before squeezing the trigger. If it's angled up, the nail could curl up into your finished product; too low, it might not hold anything. Straight on is preferred. For the last little 45-degree-angle piece of oak, I Titebond and tape it in place with blue masking tape until dry. Another way to create the bullnose profile is to take a stair tread scrap and round over the top and bottom of the side profile, just like what was done on the first tread on this job. Then, a rip cut could be made so that it's 1 ¼ inches wide, and that would be a piece with the same dimensions.

Next, I took the simple profile red oak trim and fitted it in place. It's not very thick or wide, so I opted for 18-gauge, 1 ¼-inch-long finish nails to fasten these pieces in place.

As far as sanding goes, I prefer to use an edger with 60 grit to get the treads flat. I vacuum, color-fill any gaps or nail holes and, once dry, finish off with 100-grit paper on a 6-inch Festool Rotex, using the random orbital function (as opposed to the more aggressive function). Robin and I water-popped the staircase and floor with a mixture of half water and half denatured alcohol. There are many ways to water-pop; we apply the solution evenly on the prepared surface with tile sponges. We do this as opposed to water-only for two main reasons. One, it dries faster, which in Colorado is generally not a problem. Two, it still opens the grain for a more even stain color, yet does not make it so wide open and thirsty that the look becomes overly pigmented. If I'm going to follow this procedure while staining the floor, I also do the same sequence while making samples.

We stained this floor and staircase two parts Provincial to one part Spice Brown. I enjoy mixing stain colors to satisfy the tastes of homeowners. We do a fair amount of custom flooring with several species in the same floor, and these are generally stained or sealed Neutral. So, I get a kick out of doing a darker floor once in a while.

After a base coat of finish, we put the newel posts, handrails, and balusters back in place. Because the center of the newel posts were marked earlier on the first tread, it's simple to now trace out where the posts should go. The big box stores carry kits that have brackets, screws, and wood molding (in different species) to cover the metal hardware. I definitely pilot holes first before running the screws, it ended up being nice and firm. We set the handrails back in place and replugged the caps that had been removed with new ones. Since we had forethought with our math toward the beginning of the project, the balusters went right back in place. They were marked, so it was easy to put each piece back in the precise spot it had come from. We plumbed them up and fastened them with 18-gauge, 1 ¼-inch finish nails. We applied colored caulking where needed before the final coat of finish.

Although I was working on other aspects of this job than just the stairs while completing this staircase, I estimate the total time spent approached 40 hours. That being said, I'm also about to turn 40 years old, and am not exactly a young buck who's a whirlwind of activity from sunup to sundown anymore. The first winder staircase I did took closer to 50 hours, and now the process has been becoming refined.
When starting, it seems reasonable to me to estimate 10 hours to pull newel posts, hand rails, balusters, carpet, carpet pad, tack strip, and mark and cut off the existing bullnose. 10 hours for the first two treads and risers. 10 hours for the rest of the treads and risers. 10 hours to finish off the side profiles, rough sand, and color fill. 10 hours to final sand the floor, mask off, stain, apply a base coat of finish, reinstall newel posts, handrails, and balusters, prepare for and apply a final coat of finish.
As a person becomes more comfortable with the process over a few winder staircase projects, some time will more than likely become shaved off of this rough estimate. In my contracting business, quality of work takes precedence over speed of job completion.
Hope this helps, your questions and comments are welcome. I have John Kimminau of Kimminau Wood Floors from Raymore, Mo., out this week. We're running together on a stairs project in Windsor, Colo., and a hand-scraped herringbone floor in Berthoud, Colo.-I'll most likely post on our progress from these two towns next.
Stay sharp!