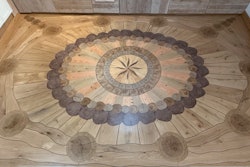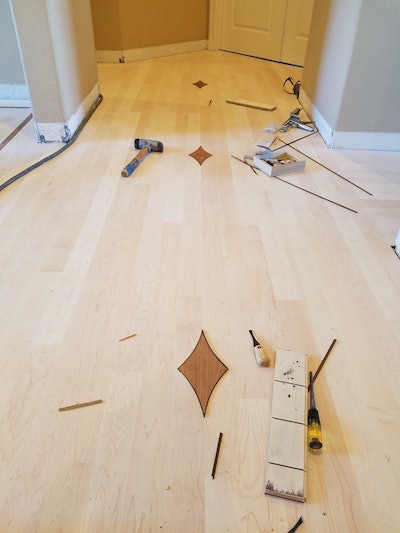
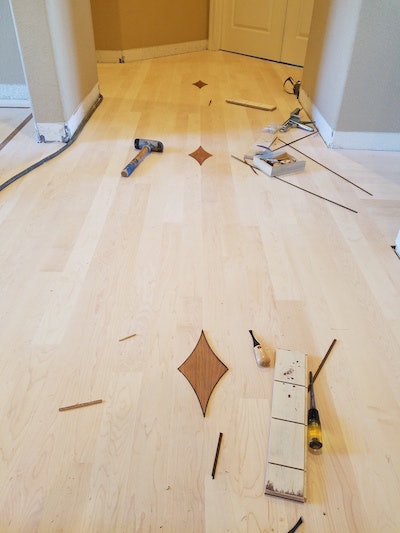
My client asked for curved diamond inlays in the floor—three in each hallway and an insert element in the office. He cut all the pieces out of paper and laid them on top of the installed floor to show me what he had in mind. I had to make six identical inserts out of Brazilian cherry. This was a one-man task, which meant I had to keep my guys doing other things while I was making the inlays. At that point the floor was awaiting the sand and finish, so progress stopped until we were done with the inlay work.
I keep all my custom tools in one big box: from little inlay router bits, double-sided tape and tracing paper to palm carving tools and circle jigs. To this day, I am sure Toby Merrill still uses his plywood circle jig and refuses to buy one with micro adjustments. (So far in this series of blog posts we know that Lenny needs a new router and Toby needs a circle jig. Contractors … LOL.)
I suggested to my client that we wrap the diamond edges with wenge stringing. Stringing is a wood inlay that is very thin and used in marquetry. It is so small that woodworkers use scratch tools to create the void in their furniture for the stringing. I thought making the curved diamonds was challenging but not challenging enough, so why not? Let’s go crazy because we don’t have enough on our plate, right?

· Make a positive blank out of cheap material like MDF. This blank represents the curved diamond inserts. The only difference is that it is not Brazilian cherry … yet.
· To make it you have to find the arc, or the shape of the curve. Each diamond has four curves. An arc is part of a circumference (circle geometry), so find the circle size that matches the curve.
· Rout out the circle.
· Draw the diamond shape on a piece of MDF. In this case I used OSB because that’s what I had lying around the shop. Cut the blank with a jig saw just outside the line.
· Cut out a section of the circle big enough to cover one curve of the diamond.
· Attach the circle piece to the diamond blank and use a flush-cutting bit on your router to clean that curve. The flush bit will follow the perfect arc on the circle and in turn will cut your rough jig saw curve to match
· Repeat the last step three more times so you end up with one positive blank representing your curved diamond.

· Use the blank to draw the shape on Brazilian cherry stock, in this case ¼” or 6.35 mm.
· Cut the insert with the jig saw just outside the line.
· Attach the Brazilian cherry inserts to the blank with double-sided tape and flush-rout them.
· Now you have six identical inserts.
Next you need to figure out how to make a template for the inserts, just like a medallion template. You will use that template on the floor to rout out the void for the inserts, then use hand tools to clean up the corners.
Use the circle you created in the first step to create the template. I cut four arc segments and nailed them to my template material, then used a plunge router to rout the template. Make sure your template is slightly bigger than the blank to allow for the stringing. I finished the corners with the jig saw just so had a visual. The circular shape of the router could not get to the corners. Although I could use a smaller bit, I was pretty confident I could use my hand tools to clean the corner fairly quickly.
By now you should have six Brazilian cherry curved diamonds with one template. Use the template to rout the void in the floor. I strongly suggest drawing the inserts on the floor and checking and re-checking that they all line up.

At that point I was shocked. I couldn’t believe what I just heard. After weeks of hard work on the job, multiple change orders (all paid for and all installation design changes) and endless re-scheduling because of this one job, I needed a minute. I said, “Please excuse me for a minute,” and I quietly walked out of the job and took a walk around the block.
You need to know this about me: I don’t yell, I don’t scream and I don’t throw tools around when I am angry or frustrated.
I get quiet because I am thinking.
My mind was at maximum focus as I was trying to come up with a new plan. That’s all it was that Friday. All I heard when my client said he didn’t like the inserts was:
Now I had to leave the job immediately to set up again and make a new set while the sanding on this job is delayed again. The job is an hour away and I still need to stop by local stores to get the materials I need.

As I walked back into the job site, my guys looked at me, not sure what was going on. I told my client I was sorry but I needed a minute to focus and come up with a new plan. I shared my thoughts with him and we agreed I was going to email him another change order for the extra time and material. This time was different, though—I was starting to get exhausted with not being able to finish this job. You could say I gave him a hard time and told him how it was at that point. I think he felt pretty bad because he went away for a minute and came back with a bottle of wine. It was a good moment in our relationship: We both kept treating each other with respect and courtesy even though I pushed him back a little that morning.
Before I left, I took my guys outside and calmly explained to them what the new plan was. They went back to work as I drove away into the sunset … well, not really—to the lumberyard.
So, next time we will discuss how to rout out the new diamond out of the floor, make and install new ones without stringing.
Be cool.


