Over the years, veteran floor sanders have developed a wide variety of effective methods for smoothing out the rough surfaces of wood floors.
Some of those methods are determined by the species of wood or the pattern of flooring being sanded, or by the type of stain or finish that will be applied. Some methods are simply the product of personal preference. So, while it is impossible to detail every possible method that will work in every likely circumstance, most knowledgeable floor sanders agree on the basic principles that should be applied in any circumstance. Here are a few of them:
• Use the proper grit sequence: A properly sanded floor results from employing a sequence of cuts, using progressively finer grits of sandpaper. The purpose of the first cut is to flatten the floor as much as possible and — in the case of a previously finished floor — to remove old finish and stain. The purpose of succeeding cuts is to remove the scratches left by preceding cuts.
Recommendations tend to favor at least three cuts, followed by a final surface preparation with the buffer, especially if the floor is to be stained. The final surface preparation will use a fine-grit screen or sandpaper disc. Standard practice dictates using a coarse-grit paper for the first cut, followed by medium-grit and fine-grit papers for succeeding cuts.
When resanding an old floor, the number of cuts and the grit of paper used may be affected by the condition of the floor, the type of finish to be removed and the thickness of the boards. (See "Remember that there are variations when refinishing old floors" on page 116 for specifics on resanding old floors.)
The number of cuts and the grade sequence of sandpaper required to adequately sand a floor may depend on the species of the wood,the condition of the floor and the type of finish to be applied, but some general rules apply in all cases.

• Skip no more than one grade of paper between cuts. If your first cut is with a grade-36paper, for example, use grade 50 for your second cut and grade 80 for your third cut. Skipping from grade 36 to grade 60 or 80 will leave deep scratches in the floor.
In the "right" example above, the first cut uses a coarse-grit paper (grade 36, for oak, for example), which creates deep scratches. The second cut uses a medium-grit paper (such as grade 50) to remove the deep scratches created by the grade-36 paper, leaving shallower scratches. The third cut uses a fine-grit paper(grade 80, for example) that removes the shallower scratches left by the grade-50 paper. The resulting scratches, which are shallower still,should leave a surface that appears smooth.
The wrong way, as indicated above, skips too many grades of sandpaper. The initial sanding with a coarse-grit paper (such as grade 36) leaves deep scratches, and the second cut, which skips the medium-grit paper and jumps all the way to fine grit, removes only the tops of the "peaks"left by the first cut. The deeper scratch marks will remain,resulting in a rough, unevenly sanded surface.
• When choosing your grit sequence, determine which grit you want to end with, then work backwards. For example, if you are going to make three cuts and want to end with an 80-grade paper, use a 36-50-80 sequence (skipping only grades 40 and 60). If you want to end with a 100-grade paper, use a 40-60-100 sequence (skipping grades 50 and 80).
• Sand in the direction of your machine's aggressive cutting side. You should know whether the sanding surface (drum or belt) of the machine is set up to cut from the right or the left. If the machine is set up to cut aggressively on the right side of the drum, begin sanding on the left wall and move right. If the machine is set upto cut aggressively on the left side of the drum, begin sanding on the right wall and move left.
• Sand in the direction of the flooring. Start the machine with the sanding drum raised off the floor. As you start forward, gradually lower the drum to the floor and continue moving forward. Before reaching the opposite wall, raise the sanding drum from the floor, then move backward over the same path, again lowering the drum and raising it when the pass is complete (see illustration above).
RELATED: Sanding 101: Wood Floor Sanding Basics
• Keep the machine moving. Always keep the machine moving when the drum or belt is turning and the sandpaper is in contact with the floor. The weight of the machine, combined with the speed of the drum or belt, will very quickly cut a drum mark in the floor that will be all but impossible to remove. Also, the operator must move the machine smoothly and evenly across the floor.
• Move the machine over no more than half the width of the belt or drum. On each sanding pass, move the machine at least 2 inches, but no more than half the width of the drum or belt (4 to 6 inches), then repeat the forward and backward passes.
• Reverse direction and stagger ends. When you have sanded two-thirds of the room, turn the machine in the opposite direction and sand the remaining third in the same manner, overlapping the two areas by 2 to 3 feet.
The overlap area should be staggered every two or three passes (see illustration).
• Diagonal sanding may be more effective. Sanding strip or plank floors is normally done either parallel or at a slight angle (7 to 15 degrees) to the direction of the boards, but never directly across the boards. A diagonal cut is especially effective if the floor is uneven. If the first cut is diagonal, the second cut should be parallel to the boards, with the same grit paper used on the first cut.
• Some floors will require specialized techniques. That's especially true with floors that include multiple species of wood, those that include mixed media (such as metal or stone), and floors in which the wood grain does not run in the same direction.
When sanding with the grain of the wood, a drum or belt machine does not cut as aggressively as it does when it is sanding across the grain. Where grain directions differ or where species of different density are next to one another, a drum or belt machine will dig into("dish out") the cross-grain or softer wood areas and leave the harder woods or areas cut with the grain smoother and higher.
• On patterned floors and floors with multiple species, cut on a 45-degree angle in two directions. A third cut along the long dimension of the room must also be made, and you may also make a fourth pass, using a buffer and hard plate. Extra scraping and hand-sanding work may be required.
In choosing the grits of sandpaper to use, consider that softer woods should be sanded with a finer-grit paper. Therefore, choose the paper you need for the least-hard material in the floor.
RELATED: Taming the Buffer: Understanding How a Wood Floor Buffer Works, Part I
• Use a hard plate in areas where grain changes direction, or where wood species of different density are adjacent to one another. Hard plating can help prevent"dishing out" in these instances. The process employs a buffer, fitted with a hard plate and a sanding disk — but without a sanding pad.
• Use the edger after each cut with the big machine. The edger sander should be used to sand along the baseboards and in closets, corners and other areas where the drum or belt sander could not reach,using a similar progression of grits.
The edger should overlap into the drum- or belt-sanded area. The most effective way to use the edger is to cut cross-grain first to flatten the floor, then move it in a circular or orbital fashion along the wall, as much as possible in the direction of the grain, edging from the wall to the field. As with the drum or belt sander, care should be taken to keep the machine moving to prevent gouges. Some professionals also recommend using a backup pad as an edger cushion to minimize marks. Even when done with care, however, the edger may leave swirl marks, which can be eliminated by hand-sanding or scraping.
Never apply pressure or bear down on the edger to produce extra cutting power. This is not only hard on the machine, it also results in unsightly "dish" markings in the floor.
• Hand-scrape and hand-sand areas not reached by the edger. Scrape in the direction of the grain whenever possible. Follow this by hand-sanding with a sanding block to help blend the scraping marks in with the rest of the floor.
• Avoid picture framing. Perhaps the most difficult aspect of sanding is achieving a consistent sanded surface throughout the entire floor. The most obvious error is called "picture framing," which occurs when the edger-sanded areas around the perimeter are inconsistent with the drum- or belt-sanded areas in the center. Often, this will not show up until after the stain and/or finish are applied, but the effect is, as the name implies,that the room has been "framed" with a different color.
There are a variety of ways to avoid this problem. To begin with, hand-sanding along the overlap can help blend the two areas together. Also, the buffer, fitted with a screen or sandpaper disc, can help smooth out any inconsistencies across the floor.
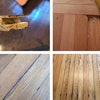
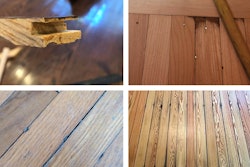
• Remember that there are variations when refinishing old floors. In most cases, you will want to remove the base shoe moldings in order to sand as close as possible to the baseboards. Also, you need to remove staples and tacks protruding from the floor and you may need to repair or replace damaged boards. Before sanding old floor finishes, paints or adhesives,check to make sure they are not lead- or asbestos-based. If the finish, paint or adhesive contains lead or asbestos— or if you are not sure — do not sand the floor unless you first contact local authorities for proper abatement procedures.
Other differences have to do with the type of flooring to be refinished. Solid3/4-inch flooring, for example, can be sanded and refinished a number of times without problems. Caution should be exercised with thinner flooring and with engineered flooring, however. In any case, remove as little of the wood as necessary to provide a satisfactory surface for refinishing. Always start with the least aggressive sandpaper that will do the job. If unsure of the thickness of the flooring, remove a heat vent or find another area where the thickness can be measured.
If the finish coat to be removed is very thick or the floor has been painted, sandpaper may load up. In these cases, a very coarse "open coat" paper may be necessary for the first cut. Once bare wood is reached, the usual grits of sandpaper can be used for the final cut or cuts. The number of cuts needed will depend on the condition of the floor.
In general, factory-finished floors can be resanded and refinished the same as floors that were originally sanded and finished on-site.
Any floor that has ever been waxed will be difficult to convert to a non-wax finish, since most finishes will not bond properly to a waxed surface. Sanding may not be sufficient, since it's possible that wax may have penetrated into side and end joints, and may contaminate the finish. In many cases, the best solution is to maintain the floor as a waxed surface.
• Fill small cracks and nail holes. Some fillers should only be applied before the final cut. Others may be used at any time in the process, even before sanding begins. As always, follow the filler manufacturer's recommendations. Some contractors use a commercial wood filler that is compatible with the stain and finish to be applied, while others prefer to mix their own filler, using wood dust from the sanding process to create a paste that can be troweled into the cracks and holes.
Remember to vacuum after each step on the job. After the final surface preparation is completed and before any stain or finish is applied, the room should be cleaned, swept and vacuumed, removing dust from all surfaces.
• Follow these basic steps and you're well on your way to a successful sanding career. The experience you gain along the way will teach you multiple techniques to deal with the limitless variety of challenges wood flooring can throw your way. But, like a trained athlete, you'll always have the fundamentals to fall back on.
Safety First
Spontaneous combustion is one of the most serious safety issues facing floor sanders. To minimize the danger:
• Dispose of sanding dust safely. Keep an eye on the dust collection bags on all equipment. Empty the bags often in a proper container. Also, always empty dust collection bags before transporting the machine or leaving the job site — even if you’re just leaving for a short time.
• Always remove dust receptacles from the job site at the end of every day and dispose of them in the proper manner. For that matter, it’s a good idea to remove dust receptacles any time you leave the job site for any length of time.
Another important safety issue involves the proper operation of the sanding machinery. The following safety guidelines should be adhered to:
• Proper electrical connections are essential. Refer to local electrical codes and to manufacturers’ guidelines for each piece of equipment.
• Read and understand the warnings and operational instructions that are provided by the manufacturer of each sanding machine.
• Eye, ear and respiratory protection are recommended.
• Safe work shoes (with laces tied) are important.
• Make sure you are always in complete control of all equipment.
• Keep electrical cords away from machines’ moving parts. Also keep cords out from underfoot and off your shoulders, since electrical cords can be the cause of injury. Use the manufacturer’s recommended apparatus for proper cord control.
• Unplug all machines when you are repairing or adjusting them, or when changing abrasives.
• Smoking should be prohibited at the job site.
RELATED: Safety Lessons from Real Wood Flooring Contractors
Troubleshooting
Floor sanders may sometimes encounter sanding imperfections known as chatter marks or waves. Chatter marks are defined as consistent sanding imperfections across the grain of the wood, varying from 1⁄4 inch to 1 inch apart. Waves are generally 1 to 6 inches from peak to peak. They have a defined, but smooth peak and valley, and they tend to become worse and increase in number as more passes are made over them with a sander. Most chatter marks result from the drum being damaged or out of balance. Other causes include worn belts or bearings; out-of-balance dust fans; damaged wheels or wheels with dirt or other debris embedded; improper paper installation; improperly stored abrasives; and inadequate power-supply connections.
Heavy chatter marks can be removed by cutting on a diagonal with a repaired and/or properly functioning machine. Minor chatter marks can be removed by using a hard plate with a finer grit sandpaper disc. Waves can be caused by an out-of-round wheel, but are more likely to be caused by subfloor imperfections. Waves are most obvious after a finish is applied and a low angle of light is cast on the floor. Waves can be eliminated by slowing down, and by cutting in the direction recommended by the manufacturer (left to right or right to left), and by cutting at a 7- to 15-degree angle on strip and plank flooring. Some floor sanders will also hardplate the floor to remove waves.