
There are thousands of wood floors installed every day, ranging from routine 2 1/4-inch tongue-and-groove oak strip to ornate custom installations.
Out of all these projects, a small percentage of them yield a noteworthy installation, and an even smaller percentage have quality photographs that show the floor. There certainly isn't a lack of talented contractors capable of producing extraordinary floors, but not all of them utilize professional photography.
Here at Hardwood Floors, it is a constant challenge to find quality photos of interesting installations. We often receive photo submissions of projects but are unable to publish them because the photos are low-resolution, are poorly lit or lack proper composition. "A bad photo makes your project look bad and puts a tawdry message out there that the work isn't important enough to photograph properly," says Rockport, Maine-based architectural photographer Brian Vanden Brink.
Most architects and designers know the value of photography, but contractors often fall short when it comes to obtaining quality images of their work. They either don't see the need for photography or feel that hiring a photographer is cost-prohibitive. There are ways, however, to get projects photographed without breaking the bank, and when used properly, photography is an investment that can pay for itself and even generate revenue.
The need for photos
Contractors often won't blink an eye at paying thousands of dollars for top-of-the-line equipment and materials, yet they balk at spending a couple hundred dollars on photography. It's true that equipment is the bread and butter of a contracting business, but allocating a small portion of that money to photography can add to your company's profitability. Here are common ways to use photography:
• Editorial. If you do a custom, high-profile installation or one in an interesting setting, you shouldn't think twice about photographing the floors. Having your project featured in a magazine or newspaper means publicity, which is free advertising. Generally, for higher-end magazines, you need to have a professional take these photos—the higher quality the photos, the more likely it is your project will be featured.
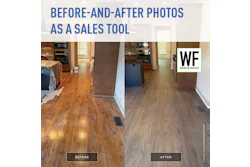
• Advertising and Promotion. Unless you rely solely on word-of-mouth advertising, you need visually appealing advertising materials to show off your company. Presentation is everything for high-end clients, and a stunning photo of your floor can separate you from the competition. Whether you're putting together a brochure, print advertising or even signage, you want to portray a positive image, and a poor photo won't entice customers.
• Portfolio. This visual résumé is key for potential clients when deciding who to use for their flooring projects. Whether you develop prints to put in your book or post images to your company's Web site, you want your photos to accurately reflect your flooring skills.
• Competitions. The NWFA Floor of the Year Contest chooses the year's best wood flooring installations in many categories. Unfortunately, the people voting can't walk through every project in person, so they must rely on photographs to determine the merit of the project. Even the most outstanding project can look mediocre with poor photography.
• Visual records. Photos of a job in progress or when finished may be crucial if there is a dispute. You may need photos to show where water damage occurred or to demonstrate an unacceptable job-site condition. While you don't necessarily need an artistic eye for such photos, you do need adequate skills and equipment to properly document such conditions.
Professional photographers
A homeowner could buy a top-of-the-line nailer, big machine, edger and buffer. He could have all the best materials at his disposal, but that doesn't mean that he could install a stable, artistically crafted wood floor like a seasoned flooring contractor could. Just as your craft is an art form that takes years of training and experience to perfect, so is photography. You wouldn't encourage a homeowner to attempt to install a custom border in the dining room, so you shouldn't expect to pick up a camera and take a magazine-cover-quality shot of your floor. "There's a reason why people who specialize in contracting services do contracting services—because they're good at it," Vanden Brink says. "There's a reason why people specialize in photography, too."
When to use a photographer
Hiring a professional photographer is a big investment and is not feasible for every job. You have to look at the return on your investment and decide when a professional will be worthwhile. "The key to hiring a photographer and the reason photographers are on Earth is to make someone else money," says Dale Hall, a Middleton, Wis.-based architectural photographer. "Ask yourself, 'How can I best use photography so I can turn around and make money with it? If the photographer comes in and does $200 worth of work, can I turn it around and make $2,000 on that shot, or $10,000 on that shot?' "
Just as homeowners can perform routine maintenance on their floors, there are situations where you can take pictures yourself. The key is knowing when to put it in the hands of a professional. Any high-profile or unusual job that could be featured in a magazine should be shot by a professional. "You'll enhance your likelihood of getting a project published if you find a good photographer and hire them to do it," says Vanden Brink. Many editors have relationships with these photographers and often turn to them for interesting projects to feature in their publications. These publications have quality standards, so if your photos are poor quality, they won't be published. Advertising and promotional materials also should be shot by a professional. If two ads are placed next to each other—one with professional photography and one with amateur photography—it's obvious which one will make a better impression with the consumer.
How to find a photographer
Depending on your area, there are several ways to find a reputable photographer. They best way is through referrals from architects, designers or other contractors. Thumb through the Yellow Pages or check the Internet for photographers as well. Checking the Internet may help you narrow your search, since many of the photographers have samples of their work online.
Once you have a list of potential photographers, talk to them in person before you hire them. Just as your clients would interview you for a potential job, you need to interview photographers to see if they are right for your project. "Make sure you look at their portfolios. Talk to them about their experience, and be very clear about what you want as the commissioning client," Vanden Brink says. The photographer you choose should have a proven track record with floors and interiors—a portrait photographer will not have the expertise or equipment that an architectural photographer will to shoot a floor. While you may be able to get a bargain from a photographer who's just starting out, cheapest is not always the best option. You may only have one chance to shoot the floor, so you don't want to risk not getting the shot. If you're going to hire a professional, you may as well do it right.
Paying for a photographer
One of the major obstacles for most contractors in hiring a professional photographer is the cost—it just may not be in the budget to commission high price photography. There are ways to get professional photos even if your budget doesn't allow it. Collaborate with the architect, designer or other contractors on the project to hire a photographer. If several people share the cost of photography, it's much more affordable. If photography is a priority, you can build the cost into the price of the job.
DIY photography
On jobs where it isn't feasible to hire a professional, you can take your own photos. By mastering a few photography basics, you can produce amateur photos that are acceptable for some in house projects and limited editorial and promotional use. A good photo is one that has a high-enough resolution, is well-lit and has a visually appealing composition.
• Resolution. When using a digital camera, one of the most common mistakes made by amateurs is not having the image in high-resolution format. (See "Low Resolution vs. High Resolution" sidebar on page 36.) For printed materials, high-resolution usually is 300 dots per inch (dpi). Depending on the quality (number of megapixels) of your camera, an image could be high resolution at 4 by 6 inches, but become low resolution when it's enlarged. The key is knowing the use of the image and how large it needs to be. Resolution also is affected by how the image is processed and printed. An image printed on a color ink-jet printer will not have the high-quality resolution of one that has been professionally processed or printed from photo-quality equipment. Ink-jet printers should be used for in house materials only.
• Photo composition. Another thing that separates a professional photographer from an amateur is knowing how to compose a photo. The subject should be clear and obvious. When shooting floors, this means the floors should be the focal point of the photo, and they should be clearly visible. (See "Photo Composition" sidebar on page 43.) Remove area rugs and furniture that cover up too much of the floor. However, the floor shouldn't be the only thing in the shot. Showing the floors in their environment by including furniture, windows or other parts of the room not only makes the shot more interesting, it gives it a sense of scale. "Through composition, you can actually steer people to what you want them to see," Hall says. "Include elements that give you an understanding of the job, the scope and size of it," Hall says. Make the room scene look pleasant and inviting by removing clutter and unnecessary items. Study room scenes in architectural and design magazines to see how professionals set up shots.
• Focus and lighting. Shooting interiors is challenging. Obtaining a shot that's in focus and lit properly sounds easy enough, but it can be very difficult, especially when shooting hardwood floors. If the lighting is tricky, your camera may have a difficult time focusing, so you might have to manually focus or change the lighting. Glare from windows and bright lights can starkly illuminate wood floors, presenting a photography challenge (see "Exposure and Lighting" sidebar on page 40). To avoid this problem, you may have to change the angle of your shot, shoot the photo at a different time of day or use external lighting equipment. An on-camera flash will rarely work. In challenging lighting conditions—most wood flooring shots—a professional is your best bet.
Equipment
If you make photography a priority, the camera will be just another tool in your toolbox. There are two basic types of cameras on the market today: film and digital. Film can produce slides, negatives or prints, which now are usually scanned into a digital format. Film is still preferred by most high-end architectural photographers because a 4-by 5-inch transparency will enlarge more sharply and clearly than the images from a digital camera. Most magazines and high-end publications still require 4-by-5-inch transparencies. This is gradually changing, however, as digital technology improves. It may not be long before film is obsolete.
For an amateur photographer, digital is the best option. A digital camera provides instant feedback by displaying a preview on its screen. If the shot is too light or too dark, you can increase or decrease your exposure until you have an acceptable photo. Shooting digital also saves time and money. You only need to make prints of selected shots rather than processing several rolls of film in hopes of a decent shot. If you are savvy with image-editing software, such as Adobe Photoshop, you can crop and digitally edit the image. By using storage media such as CDs and DVDs, you can easily archive photos of your jobs without having to store large stacks of prints.
Buying a digital camera is just as complicated as buying a computer: There are a lot of options, and technology changes rapidly. Prices and quality of digital cameras range from a $10 one-time-use digital camera to well over $5,000 for professional equipment. You don't need to invest in professional quality equipment, but you should consider a high-end consumer camera of at least four megapixels (see "Glossary of Terms" sidebar on page 38). This will allow you to create high-resolution 8-by10-inch images. You should consider accessories such as an external flash, a tripod and extra memory cards. Check buyers guides and consumer ratings, and shop around to find not only the best price, but a knowledgeable staff and service. Also, make sure that the camera is compatible with your computer and its operating system.
To further improve your skills and knowledge, consider taking a photography class or seminar. The more you know about photography, the better chance you have to present your business in the best light.


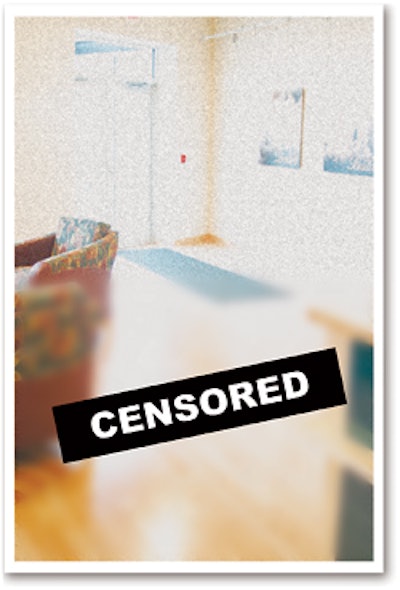
Low-Resolution vs. High-Resolution
The difference between a low-resolution and high-resolution image is quite apparent when it is printed. A low-resolution cannot become high resolution. Even if the image was originally high-res, once it becomes low-res, its digital information is lost. The more an image is enlarged, the more pixelated it becomes. Below are two shots. The top one is 72 dpi, which is the equivalent of the quality of a lower-end digital camera or scanner. It was enlarged 335 percent. The 300-dpi image at the bottom was professionally scanned from a 4-by-5 transparency and reduced to fit the photo box.
Glossary of Terms
When shopping for a camera, the technical jargon can be intimidating.Here’s a guide help you through your purchase.Aperture - The size of the opening of the lens that allows light in. Expressed in f-stop measurements (f/2, f/2.8, f/4, f/5.6, etc. …). If there is too much light, you need to decrease the aperature (i.e. f/4 to f/5.6), or “stop down;” if there is too little, you need to increase the aperature (i.e. f/4 to f/2.8), or “stop up.”Exposure - The shutter speed and lens aperture setting on the camera. Set in automatic exposure mode, a camera will adjust one or both of these factors.Guide Number -The rating of a flash’s power.Hot Shoe - The bracket on top of the camera that houses an external flash.Shutter Speed - The amount of time the shutter is open to the light. Expressed in seconds or fractions of a second (1/60, 1/30, 1, 1.5, etc. …). With a higher shutter speed, less light is allowed in to expose the shot; a slower shutter speed allows more light. A tripod is recommended at slower shutter speeds, otherwise the image probably will be blurry.
Digital-Specific Terms
Compression - The process of reducing a digital file’s size. Some compression forms reduce the quality of a file.Flash Card - A type of removable storage media where the camera’s digital information is stored. The more memory on the card (32 Megabytes (MB), 64 MB, 256 MB, etc. …) the more photos you will be able to takewithout having to download the images to your computer.JPEG - A digital file format developed by the Joint Photographic Experts Group that compresses a digital image. Most digital cameras produce JPEG images.Megapixel - Equal to a million pixels, this is used as a measurement of the digital quality of a camera. Generally, the more megapixels a camera has, the higher the resolution it will produce.Pixels - Tiny digital elements that form a photograph or image. A computer displays images in a grid of pixels varying in color and brightness.Pixelization - This occurs when a photo is enlarged beyond its acceptable resolution and the pixels in the image become obvious.Resolution - The number of pixels used to create an image. This is expressed in dots per inch (dpi). For high-end printed materials such as magazines and brochures, 300 dpi is the standard. A computer monitor views images at 72 dpi, which is considered low-resolution.RGB - A color system that creates a color photo with values of red, green and blue. Digital cameras and computers display images in RGB.
Exposure and Lighting
Floors are tricky when it comes to lighting, especially when dealing with outside light from windows. Setting a camera on automatic exposure and flash setting will rarely produce the best results. The first photo was underexposed, with not enough light to show the floor. The second photo was overexposed, with too much light “washing out” the floor. The third photo is exposed correctly, however, the glare from the glass doors washes out the floors. Better options would be to shoot the photo at a different time of day, or change the angle of the shot, as shown in the last photo.


Photo Composition
Composing a photo is essential to an effective photo. While the flooring should be prominent in the photo, there should also be other elements that show the floor in its application and give it a sense of scale.